Living room downlights: how many you need and where they go

Some links below are affiliate links: if you buy through them I may earn a small commission, at no extra cost to you. As an Amazon Associate I earn from qualifying purchases. How LightGuru makes money

Mike's quick answer
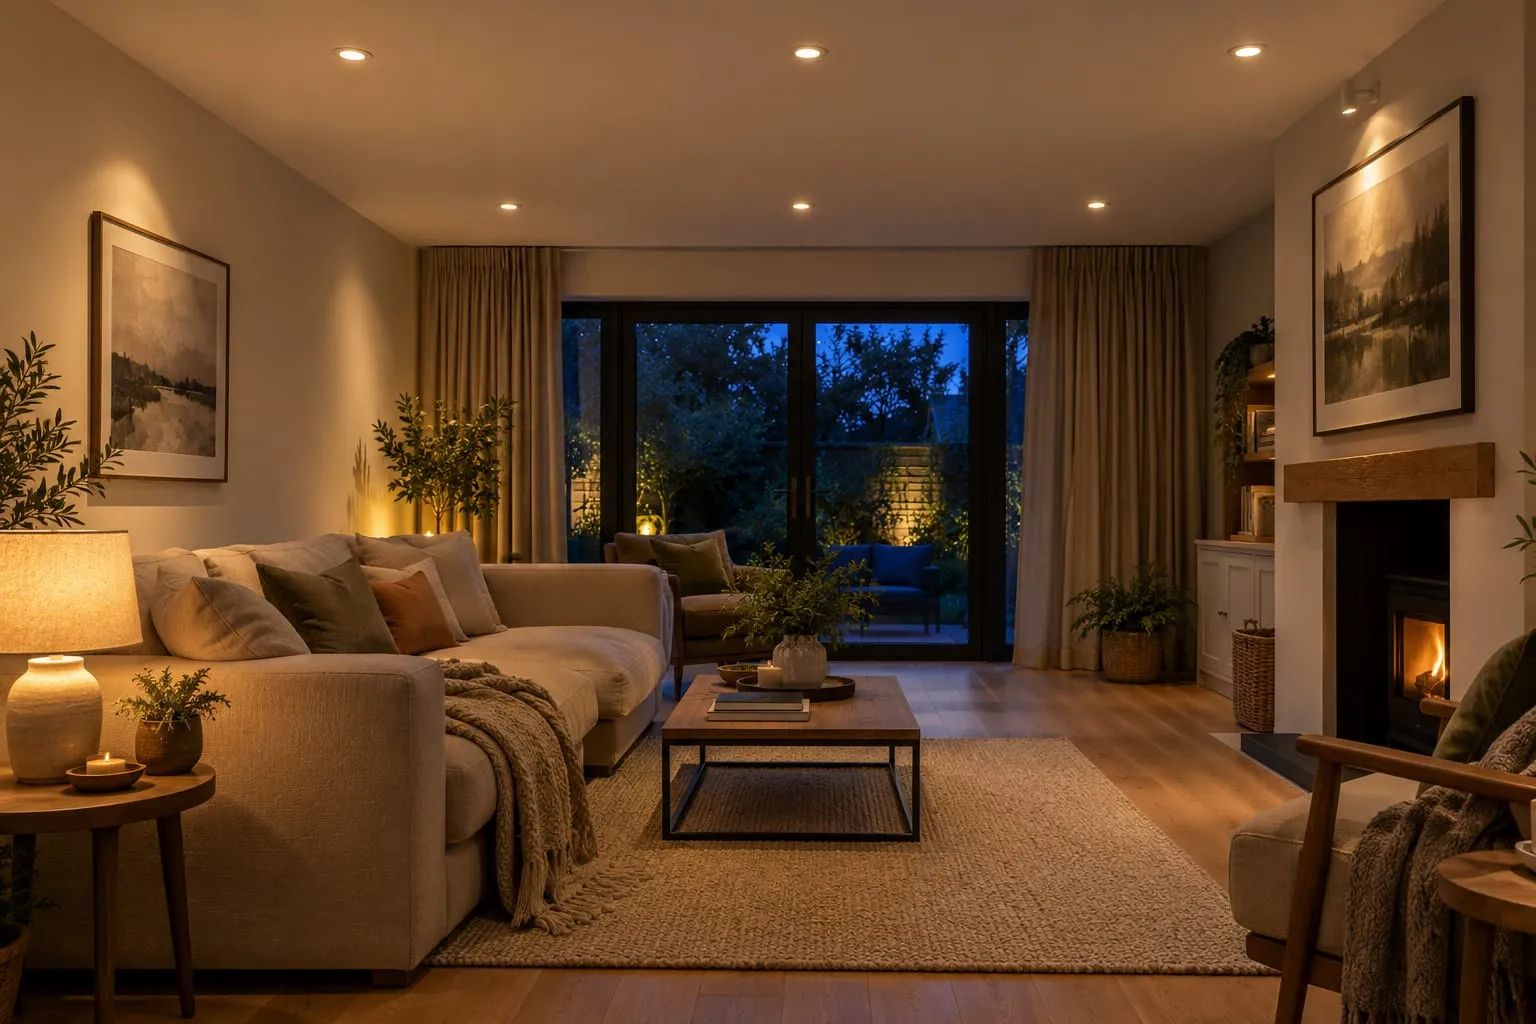
Fewer than you think. On a standard 2.4 m ceiling, most living rooms of 12–20 m² need four to six downlights, about 1.5 to 2 m apart and 600 mm to 1 m from the walls, kept off the seating. Use wide-beam, warm white (2700K–3000K) fittings on a dimmer, and let lamps do the rest.
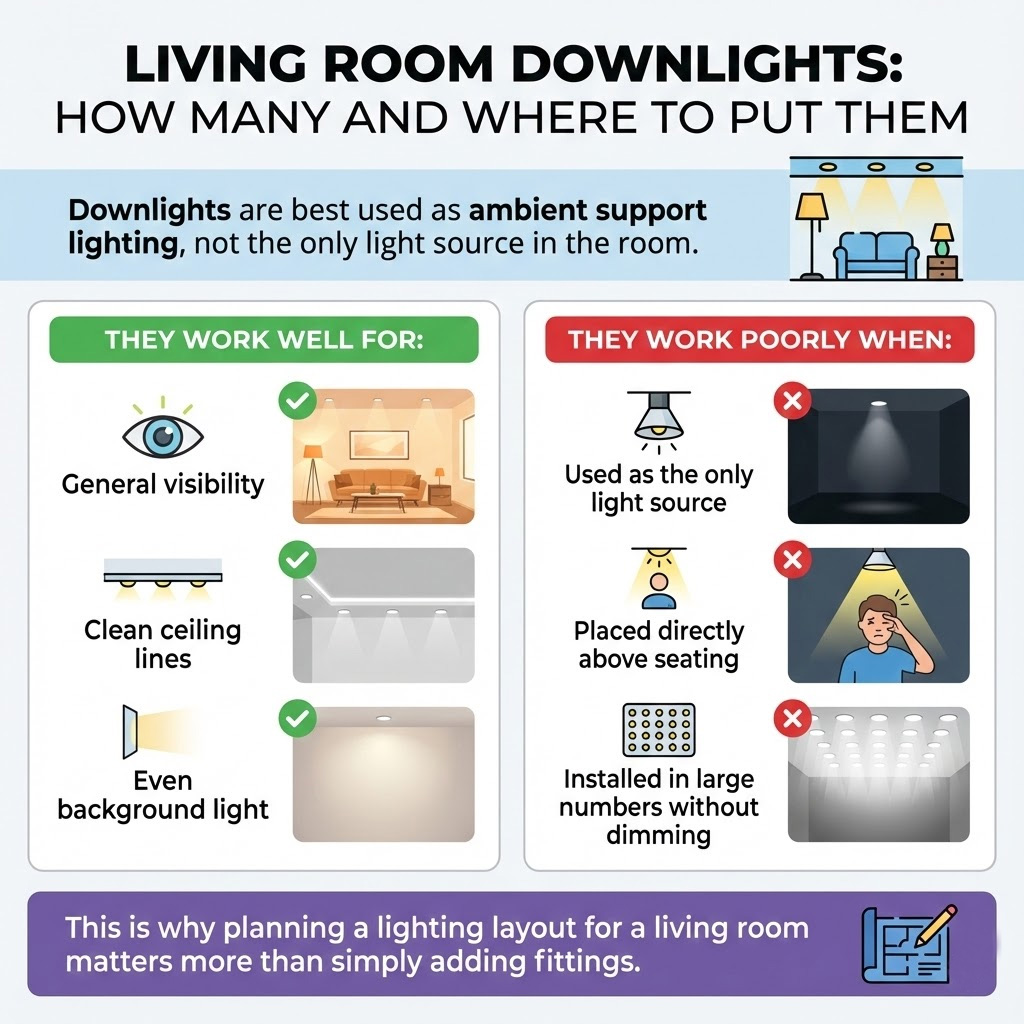
Downlights can make a living room look clean and modern. They’re also one of the easiest ways to get it wrong. Too many and the room feels like an office. In the wrong places they shine into your eyes when you lie on the sofa and cast shadows down everyone’s faces.
The answer is to treat them as the background layer, not the whole scheme. In a living room they’re there so you can see to tidy up and find things. Comfort in the evening comes from lamps and wall lights, as the living room lighting guide explains. Plan them that way and you need fewer than you’d think, and they can be lower output than the ones in your kitchen.
How many downlights does a living room need?
For a standard 2.4 m ceiling, these ranges work in most rooms:
| Downlights | Typical layout | |
|---|---|---|
| Small, up to 12 m² | 2–4 | A pair, or a square of four |
| Medium, 12–20 m² | 4–6 | A square of four, or two rows of three |
| Large, over 20 m² | 6–9 | Split into zones on separate switches |
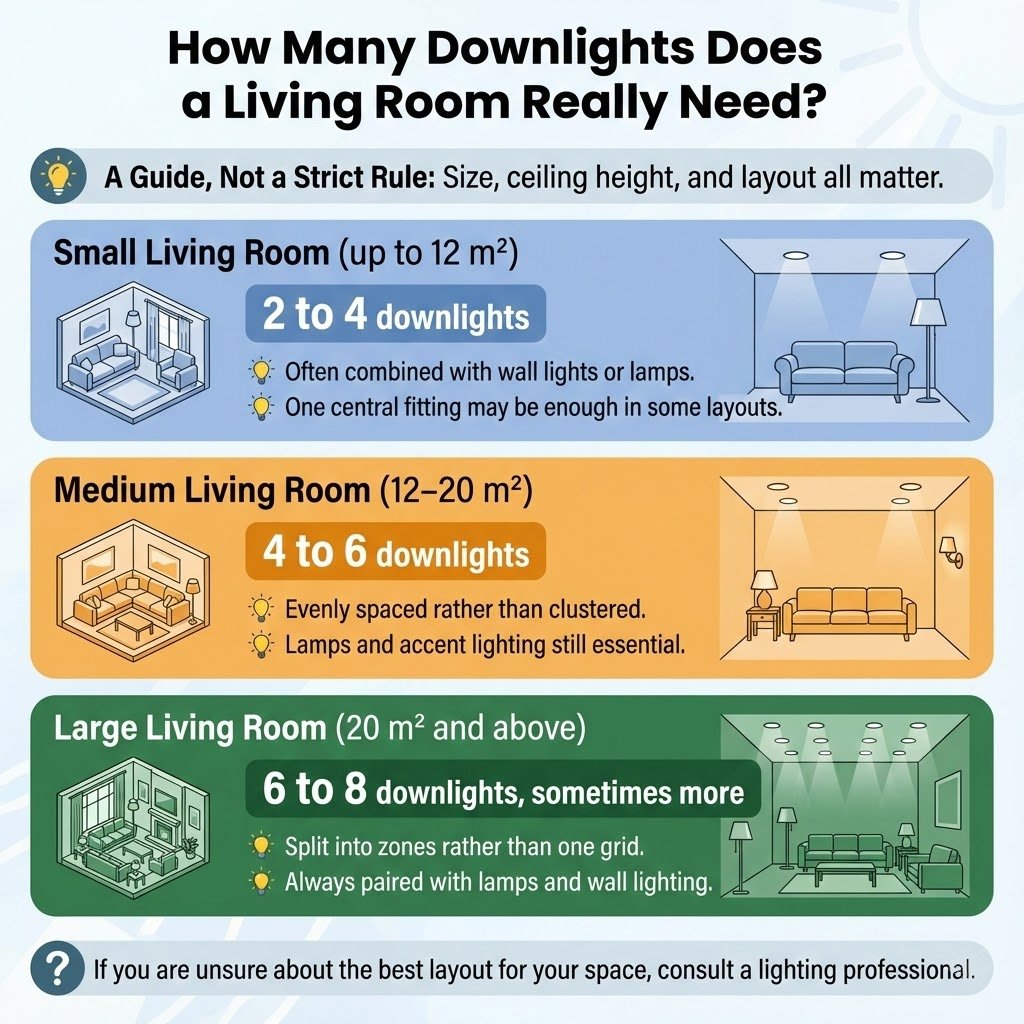
Those numbers assume you also have lamps. A living room lit by downlights alone needs more of them, and still won’t feel comfortable after dark.
Output matters as much as quantity. Living room downlights don’t need kitchen strength: around 300 to 450 lumens each is plenty. Six 400-lumen fittings give 2,400 lumens, which is already more than a 20 m² living room needs from its ceiling at full power, so put them on a dimmer and don’t chase the brightest fittings you can find. If you want to check the whole room, the lumens guide has a calculator.
Where to put them
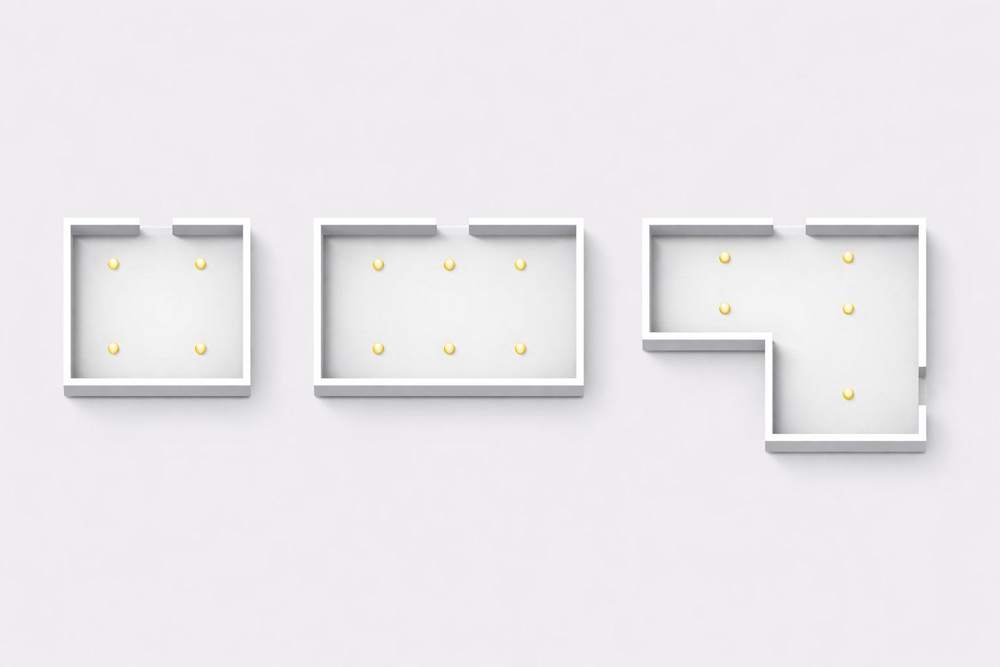
On a 2.4 m ceiling, space living room downlights about 1.5 to 2 m apart and start 600 mm to 1 m out from the walls. That’s wider than in a kitchen, where you need even light on a worktop; in a living room you only need even background light. A 5 × 4 m room usually works with two rows of three, 1 m in from the walls. A 4 × 4 m room usually needs only a square of four.
Then adjust for the furniture. Keep downlights off the sofa and armchairs: a light directly above the seat shines into the eyes of anyone leaning back and lights the top of their head rather than their face. Move the nearest lights so they land in front of the seat rather than above it (with a sofa against the wall, that usually means a little further into the room), or leave a gap over the seating and let a lamp cover it.
Watch the TV wall too. A downlight just in front of the screen will show up as a reflection from the sofa, and one close to the wall above the TV lights the wall brightly behind the picture. Leave that area dimmer, or use a separately switched pair for it.
The downlight spacing calculator works out positions for your room size and ceiling height. If you’re doing other rooms too, the room-by-room downlight layout guide covers each one.
Zones and switching
In a larger or open-plan room, don’t put every downlight on one switch. Split them into groups: the ring around the seating, a pair washing a feature wall, the ones near the door or the kitchen end. A two-gang dimmer switch at the door lets you run them separately, which is how you get a room that works for both tidying up and watching a film.
Even in a smaller room, two circuits help. With the outer downlights on one dimmer and the rest on another, you can light the walls softly in the evening and leave the centre of the room to the lamps.
Beam angle and colour
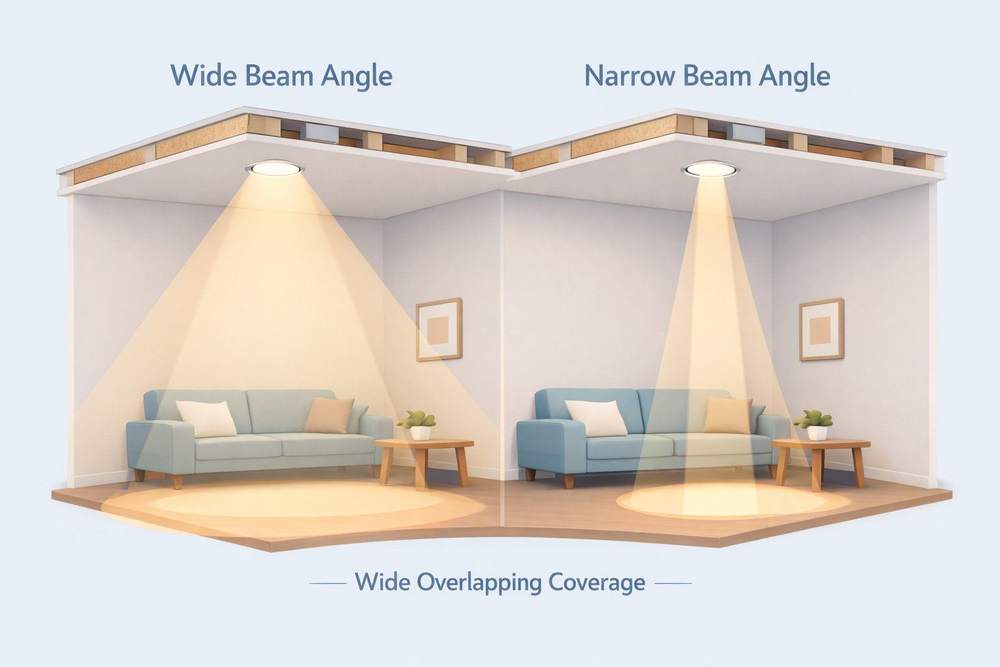
For general light, use wide beams of 60 degrees or more. The pools of light overlap, the room looks evenly lit and you see less of the bright source when you look up. Narrow 36 to 40 degree beams make bright circles with darker gaps between them, and in a living room that looks patchy. Save narrow beams for adjustable fittings aimed at a picture or a fireplace.
Use warm white: 2700K for a cosy room, 3000K for a slightly crisper modern look. Whichever you pick, make every downlight the same, and match the bulbs in your lamps. Cool 4000K downlights are one of the commonest reasons a living room feels clinical at night. The colour temperature guide explains the difference.
Glare matters more in a living room than in a kitchen, because people sit back and look up. Downlights with the light source set deep inside the fitting, usually sold as anti-glare or deep-recessed, hide the bright LED unless you’re directly underneath. They cost a little more and they’re worth it over seating.
Fixed or adjustable?
| Fixed | Adjustable (tilt) | |
|---|---|---|
| Light | Straight down, even | Aimed at a wall or object |
| Glare | Low | High if pointed into the room |
| Ceiling look | Clean and calm | Busier |
| Best for | General background light | Art, a fireplace, a chimney breast |
Yellow = the better option on that line.
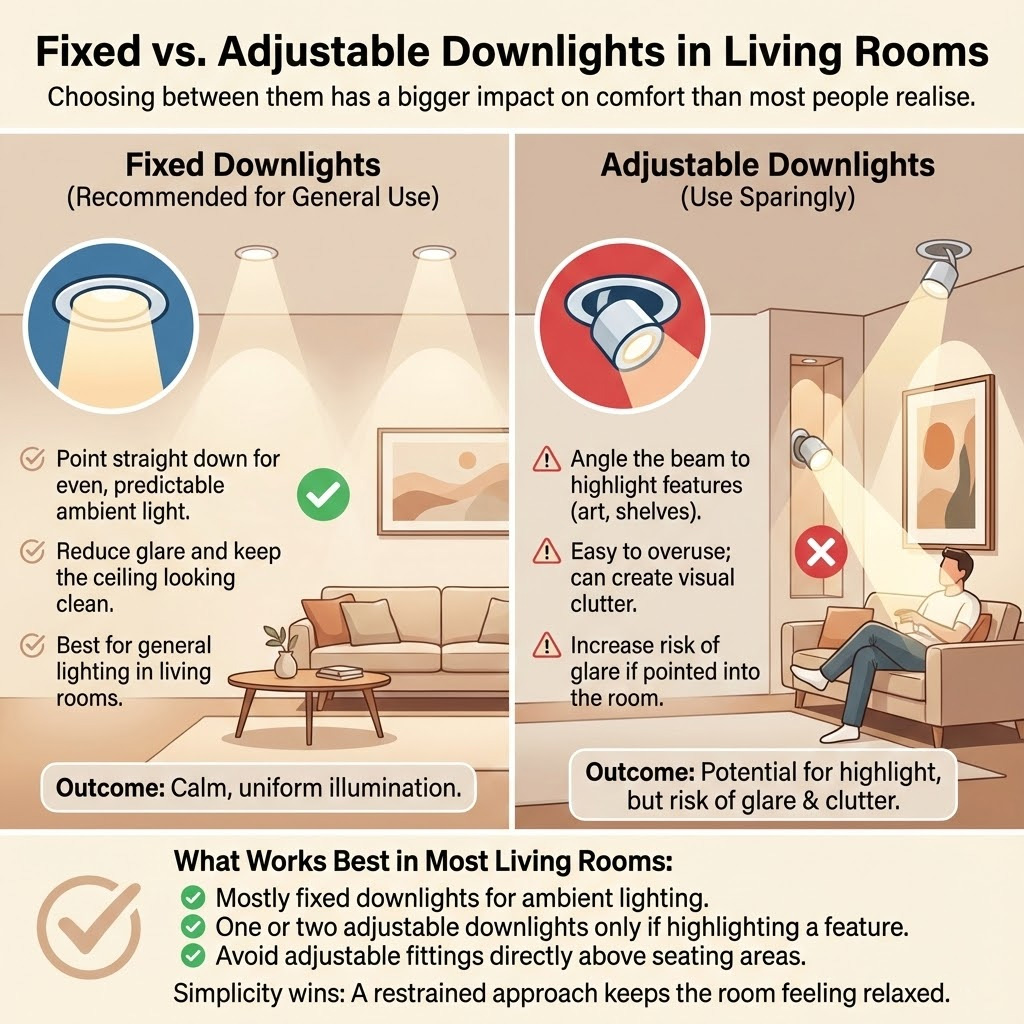
In most living rooms, fixed fittings should do the general lighting. Add one or two adjustable fittings only where there’s something worth lighting, such as a painting, a stone fireplace or alcove shelving, and aim them at it, not into the room. For more on lighting art and shelves, see accent lighting for art, shelves and alcoves.
GU10 or integrated?
GU10 fittings take a replaceable bulb, so you can change the colour, go smart with a Hue or WiZ bulb, or swap a failed one in seconds. Integrated fittings have the LED built in; they’re usually brighter per fitting, dim more smoothly and every one matches. For a living room on a dimmer, integrated is usually the better choice, and GU10 suits a tight budget, a rental or a smart-bulb setup. The full comparison is in GU10 vs integrated downlights.
Dimmers
Living room downlights should always be on a dimmer. At full power, even a well-planned layout is too bright for an evening.
Use a trailing-edge dimmer made for LEDs, and check that the bulbs or fittings say dimmable. With integrated fittings, check the manufacturer’s list of compatible dimmers and the minimum load: a few low-wattage LEDs on an old dimmer is the usual cause of flicker, buzzing or lights that won’t dim smoothly. If yours already flicker, here’s how to fix it.
Fire rating and regulations
If there’s a room above the living room, which is most ground-floor living rooms in a two-storey house, the downlights need to be fire-rated. Under Approved Document B of the Building Regulations, a light cut into a ceiling between floors must not reduce that ceiling’s fire resistance. Fire-rated downlights are made to keep that seal in a fire. They come rated for 30, 60 or 90 minutes; your electrician or building control can confirm what your ceiling needs, and flats often need more than houses. Where insulation sits on top of the ceiling, as in a bungalow or under a loft, choose fittings that are rated to be covered.
Fitting downlights where there were none means cutting holes and running new cable, so it’s a job for a registered electrician. In England, extending an existing lighting circuit in a living room usually isn’t notifiable under Part P, but a new circuit is, and a registered electrician can self-certify notifiable work.
What I'd buy
Affiliate linksFAQs
Can a living room have only downlights?
It can, but it rarely feels comfortable in the evening, because all the light comes from above. Add at least a couple of lamps or wall lights and put the downlights on a dimmer.
How far apart should living room downlights be?
On a 2.4 m ceiling, about 1.5 to 2 m apart, starting 600 mm to 1 m from the walls. That’s wider than kitchen spacing, because you’re lighting the room rather than a worktop.
Should downlights be centred in the room?
Not necessarily. Plan them around the furniture and the way you see the room, keeping them off the seating. Symmetry matters most along the line you see from the door.
Do living room downlights need to be fire-rated?
If there’s a room above, yes. With only a loft above, fire-rated fittings are still good practice and many electricians fit them as standard. Check with your electrician or building control if you’re unsure.
What wattage should living room downlights be?
Think in lumens rather than watts. Around 300 to 450 lumens per fitting is plenty for a living room, which is about 4 to 5 W for a typical LED. Fit them on a dimmer so you can turn them right down in the evening.
 Save
Save it for later
Pin this guide to one of your Pinterest boards so it's there when you start the job.