Scope: This guide covers LED strip placement and brightness for kitchens. For broader lighting principles and other fixture types, see our complete Kitchen Lighting Guide.
Disclosure: This article contains affiliate links. If you purchase through these links, we may earn a small commission at no extra cost to you.
Table of Contents
Why LED Strips Work So Well in Kitchens
LED strip lighting has become one of the most versatile tools in kitchen design. The appeal is simple: strips can go places other lights can’t. Under cabinets, along plinths, inside display units, on top of wall cabinets—anywhere you want a clean line of light without a visible fixture.
The result, when done well, is a kitchen that feels layered and considered. Worktops are properly illuminated for food prep. Cabinets appear to float. Glass-fronted units glow from within. The space works harder in the evening without relying solely on harsh overhead lighting.
But LED strips are easy to get wrong. Too bright and they glare. Wrong colour temperature and the kitchen feels cold or dingy. Poorly positioned and you see the individual diodes rather than a smooth wash of light.
This guide covers where to place strips, how bright they should be for each application, and how to avoid the common mistakes.
Understanding LED Strip Basics
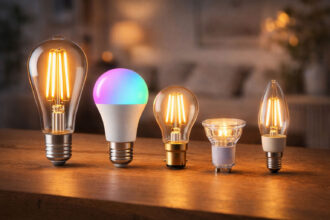
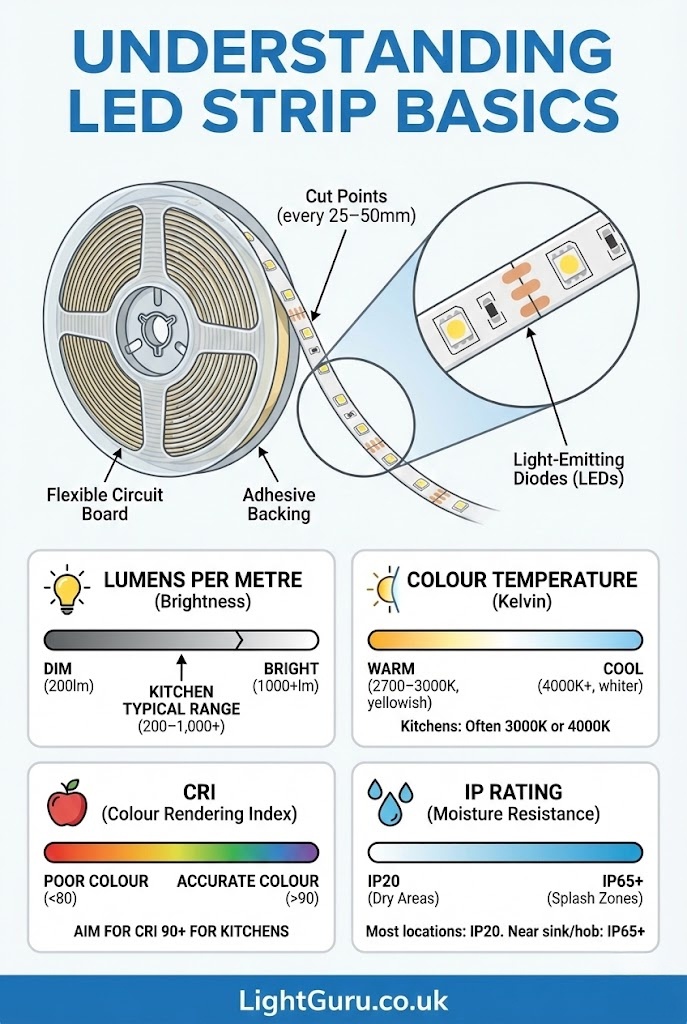
LED strips consist of small light-emitting diodes mounted on a flexible circuit board with adhesive backing. They’re sold in reels (typically 5 metres) and can be cut to length at marked intervals, usually every 25–50mm.
Key specifications to understand:
Lumens per metre indicates brightness. Higher numbers mean more light output. Kitchen applications typically range from 200 to 1,000+ lumens per metre depending on the purpose.
Colour temperature is measured in Kelvin (K). Lower numbers (2700–3000K) produce warm, yellowish light; higher numbers (4000K+) produce cooler, whiter light.
CRI (Colour Rendering Index) measures how accurately colours appear under the light. For kitchens, where you’re looking at food, aim for CRI 90 or above.
IP rating indicates moisture resistance. IP20 is fine for most kitchen locations; IP65 or higher is needed for areas exposed to splashes.
Where to Install LED Strips
The key principle with LED strips is indirect light. You want the glow, not the source. Position strips where they illuminate a surface—worktop, ceiling, floor, shelving—rather than shining directly into eyes.
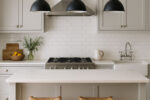
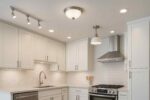
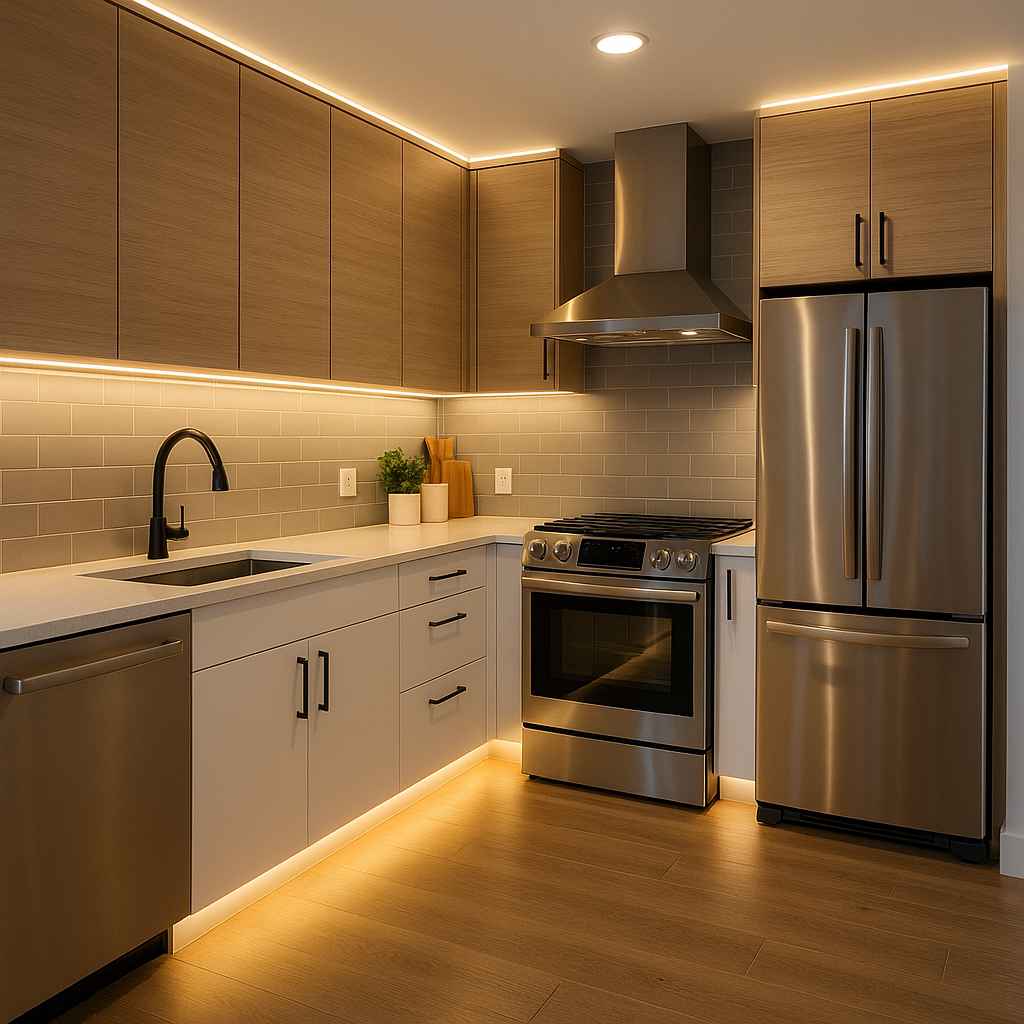
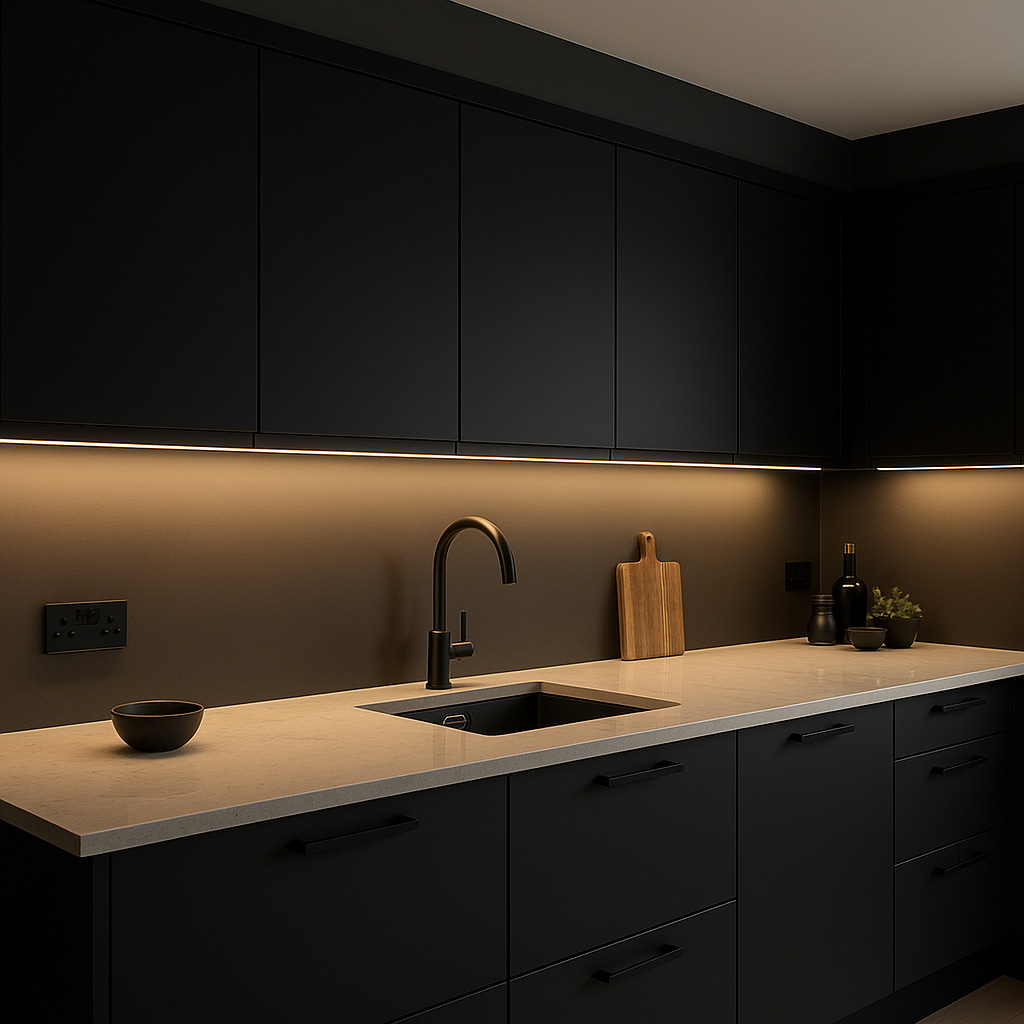
Under Wall Cabinets
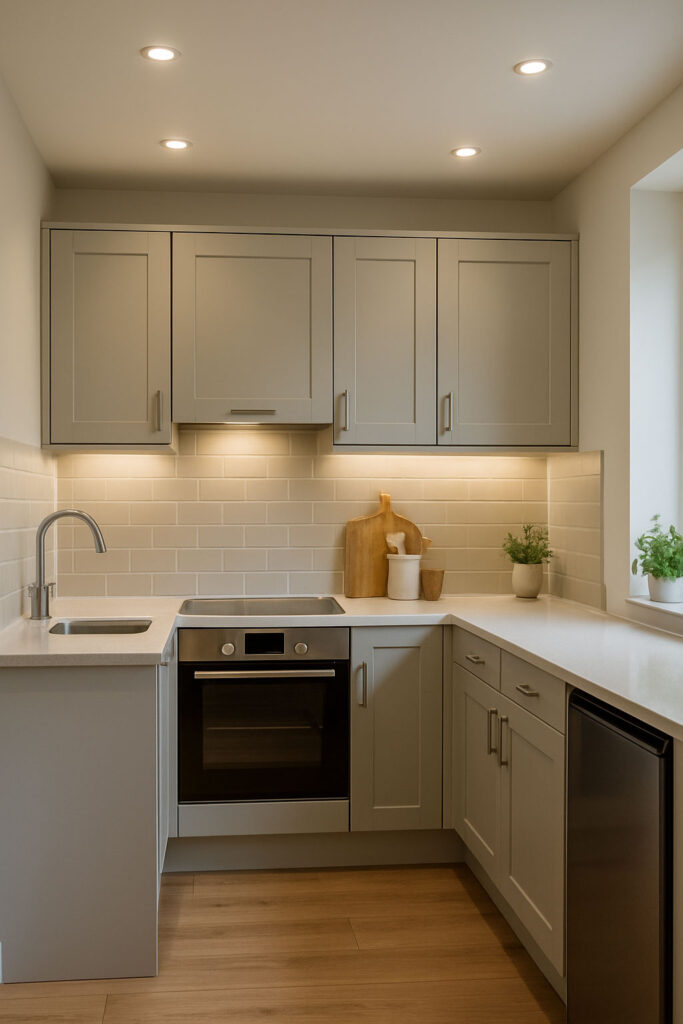
This is the most common and most useful application. LED strips mounted under wall cabinets illuminate the worktop below, providing task lighting for food preparation.
Why it works: Ceiling lights cast shadows when you stand at the worktop. Under-cabinet strips light the work surface from the front, eliminating shadows exactly where you need to see.
Positioning: Mount the strip toward the front edge of the cabinet, approximately 5–7cm back from the front lip. This throws light onto the worktop rather than the splashback. If your cabinets have a front rail or frame, mount behind it so the strip isn’t visible from normal standing height.
Brightness: 400–600 lumens per metre for effective task lighting. Go higher (up to 800–1,000 lm/m) if under-cabinet strips are your primary worktop light source.
Finish: Use aluminium LED channels with frosted diffuser covers. These hide the individual diodes, spread the light evenly, and look far more professional than bare tape.
For detailed installation guidance, see our under-cabinet lighting guide.
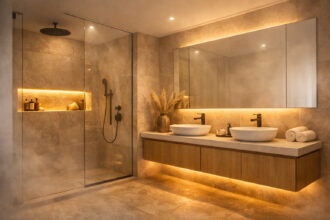
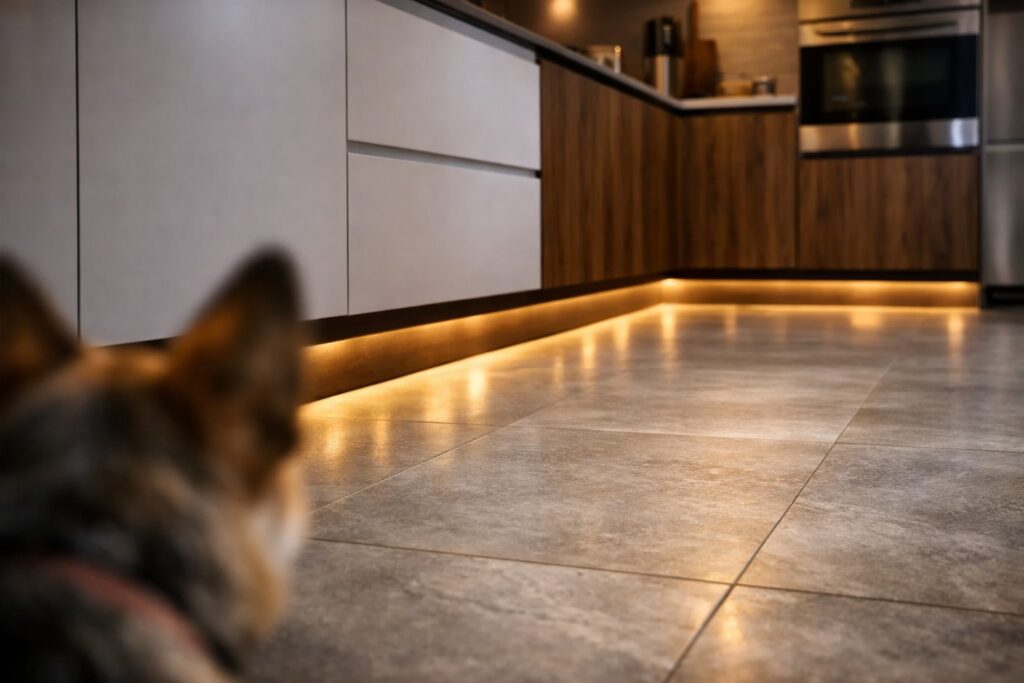
Plinth Lighting (Under Base Cabinets)
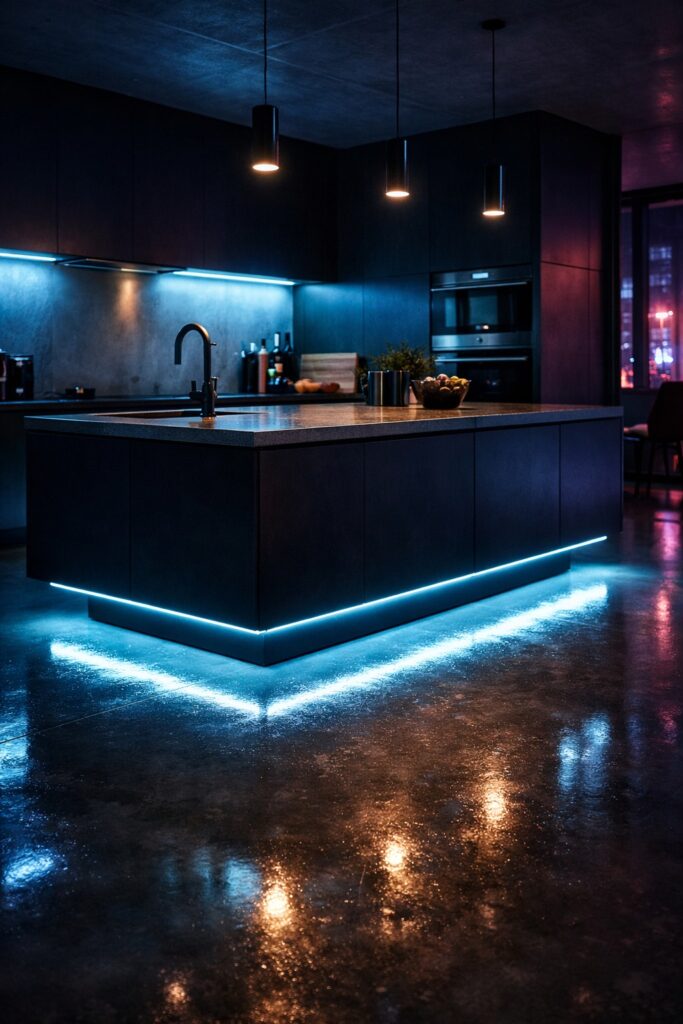
LED strips mounted along the kickboard at floor level create a floating effect—the cabinets appear to hover above a line of light.
Why it works: Plinth lighting adds a layer of ambient warmth without contributing to overhead brightness. It’s particularly effective in the evening, providing enough glow to navigate the kitchen without switching on main lights.
Positioning: Mount strips behind the plinth board, facing downward or outward toward the floor. The strip should be hidden from view when standing; you see only the reflected glow on the flooring.
Brightness: 150–300 lumens per metre is usually sufficient. Plinth lighting is accent, not task—too bright and it loses the subtle effect.
Colour temperature: Warm white (2700–3000K) works best for plinth lighting, maintaining a cosy atmosphere.
On Top of Wall Cabinets
If there’s a gap between your wall cabinets and the ceiling, LED strips on top create upward-washing ambient light that makes the ceiling feel higher and the room more spacious.
Why it works: The light bounces off the ceiling and fills the room with soft, indirect illumination. This is particularly effective in kitchens with white or light-coloured ceilings.
Positioning: Place strips toward the back of the cabinet top, facing the wall/ceiling junction. The goal is to light the ceiling without the strip being visible from floor level.
Brightness: 300–500 lumens per metre. This is ambient lighting, not task—enough to create atmosphere without overpowering other sources.
Note: This only works if you have a gap of at least 150–200mm between cabinet tops and ceiling. Smaller gaps don’t allow enough light spread.
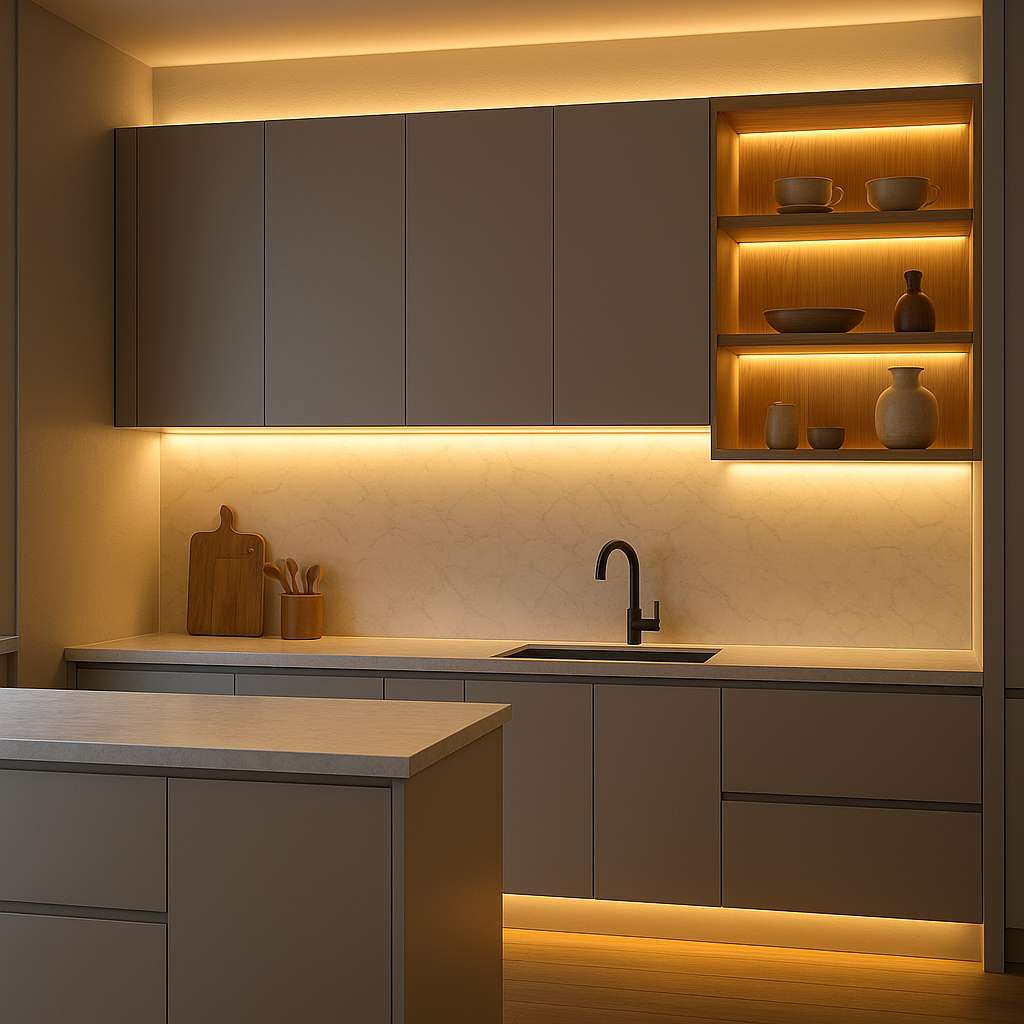
Inside Glass-Fronted Cabinets
Display cabinets with glass doors benefit from interior lighting that showcases contents and adds visual interest to the kitchen.
Why it works: Lit cabinets become focal points, drawing the eye and adding depth to the room. They’re particularly effective for displaying glassware, ceramics, or cookbooks.
Positioning: Mount strips vertically in the front corners of the cabinet (hidden by the frame) or horizontally under each shelf. Vertical strips provide more even illumination; horizontal strips highlight individual shelf contents.
Brightness: 200–400 lumens per metre. Display lighting should be subtle—bright enough to see contents clearly, not so bright it overwhelms.
Control: Wire cabinet lighting to a separate switch or dimmer so you can turn it off independently of task lighting.
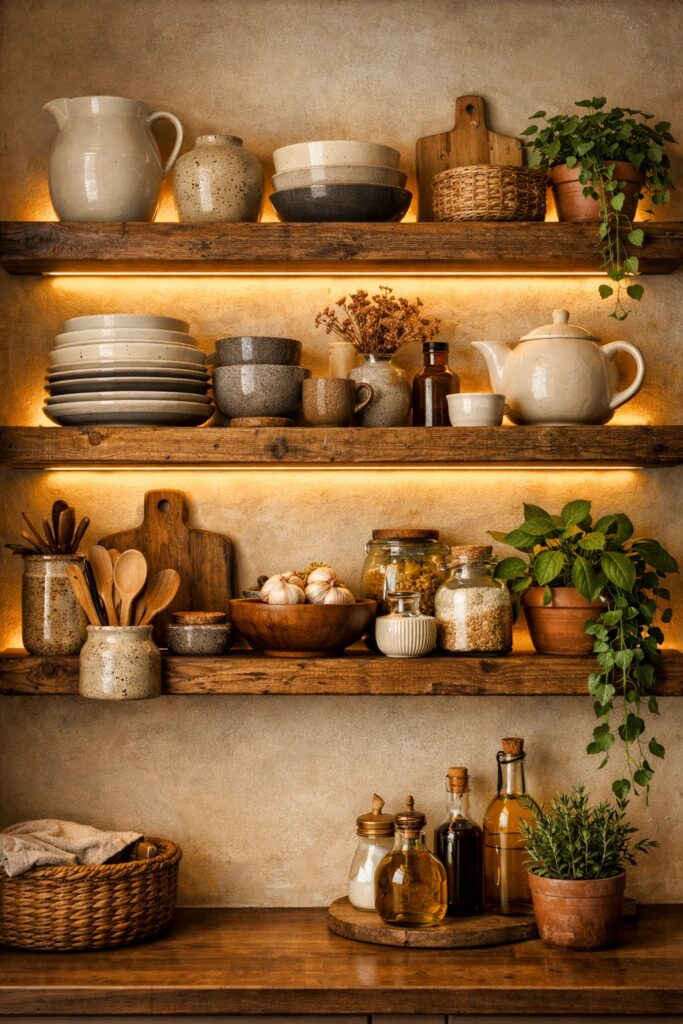
Under Open Shelving
Open shelves are increasingly popular in modern kitchens. LED strips mounted under each shelf illuminate the items below and cast soft light onto the worktop.
Why it works: It combines the function of under-cabinet task lighting with the display appeal of lit shelving. The kitchen gains visual layers without additional fixture clutter.
Positioning: Mount strips at the front edge of each shelf, hidden by the shelf’s front lip if there is one. If shelves have no lip, use slim aluminium channels that sit flush with the underside.
Brightness: 300–500 lumens per metre, depending on shelf depth and how much task lighting you need from this source.
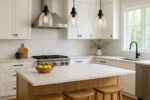
Island Perimeter or Kickboard
For islands with breakfast bars or overhangs, LED strips along the underside of the countertop overhang or around the island kickboard add definition and evening ambience.
Positioning: Mount strips facing downward, recessed behind the counter edge or plinth so the source isn’t visible. The effect should be a glow beneath the island, not visible diodes.
Brightness: 150–300 lumens per metre for accent effect.
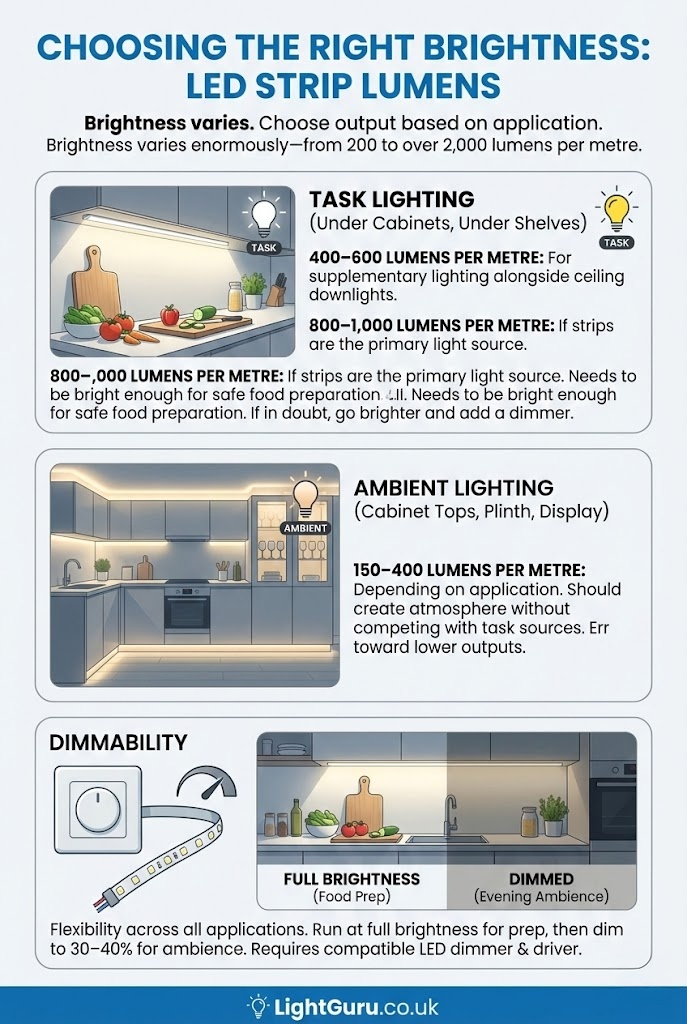
Choosing the Right Brightness
LED strip brightness varies enormously—from 200 lumens per metre to over 2,000. Choosing the right output depends entirely on what the strip is meant to do.
Task Lighting (Under Cabinets, Under Shelves)
400–600 lumens per metre for supplementary task lighting alongside ceiling downlights.
800–1,000 lumens per metre if strips are the primary light source over worktops.
Task lighting needs to be bright enough for safe food preparation. If in doubt, go brighter and add a dimmer.
Ambient Lighting (Cabinet Tops, Plinth, Display)
150–400 lumens per metre depending on application.
Ambient and accent lighting should create atmosphere without competing with task sources. Err toward lower outputs—you can always add more strips, but you can’t easily fix strips that are too bright.
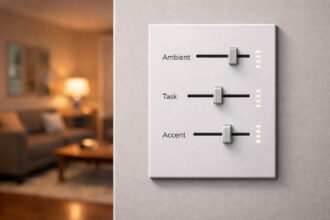
Dimmability
Installing dimmable LED strips gives you flexibility across all applications. Run task lighting at full brightness during food prep, then dim to 30–40% for evening ambience. Most quality strips are dimmable, but you’ll need a compatible LED dimmer and driver.
For help calculating total brightness requirements for your kitchen, see our lumens guide.
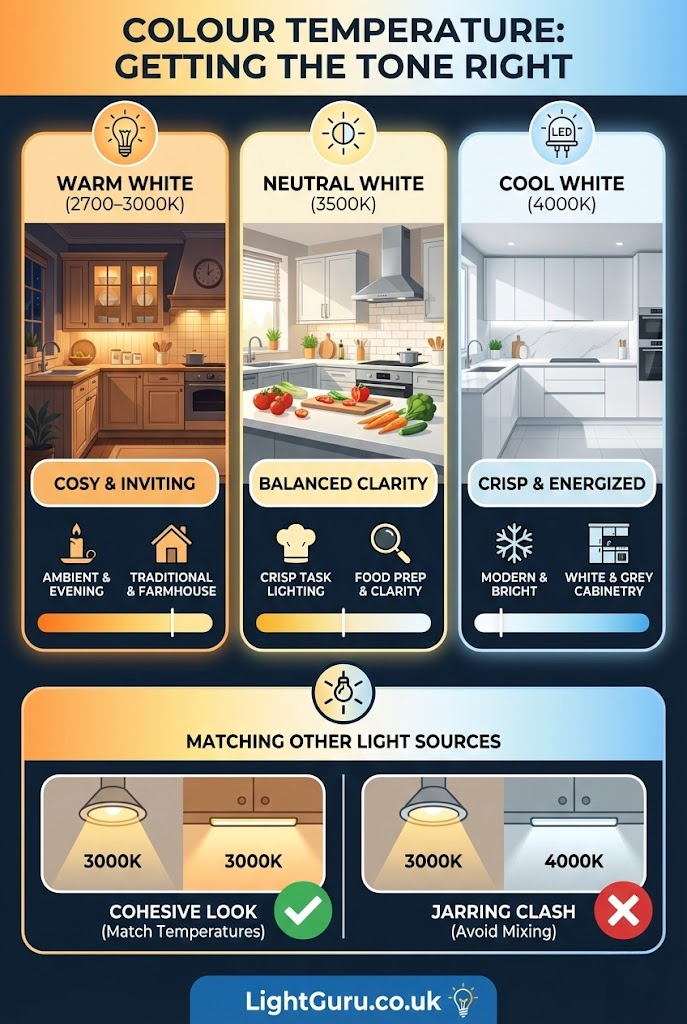
Colour Temperature: Getting the Tone Right
Colour temperature significantly affects how your kitchen feels. The wrong choice can make a space feel clinical, dingy, or disconnected from adjoining rooms.
Warm White (2700–3000K)
Best for plinth lighting, cabinet-top ambient lighting, display cabinets, and evening atmosphere. Warm white creates a cosy, inviting feel that works well in traditional, farmhouse, and transitional kitchens.
Neutral White (3500K)
A middle ground that provides warmth while maintaining clarity. Useful if you want under-cabinet task lighting that’s crisp but not clinical.
Cool White (4000K)
Best for task-focused under-cabinet lighting in contemporary kitchens, particularly those with white or grey cabinetry. Cool white provides excellent visibility for food preparation but can feel stark if used throughout.
Matching Other Light Sources
Keep LED strip colour temperature within 500K of your other kitchen lighting. If your downlights are 3000K, don’t install 4000K strips—the difference will be obvious and jarring.
For tunable strips that adjust between warm and cool, see our tunable white kitchen lighting guide.
For more on colour temperature choices, see our kitchen colour temperature guide or our broader colour temperature explainer.
Installation Essentials
Aluminium Channels and Diffusers
Bare LED strips show individual diode dots—visible points of light rather than a smooth line. For a professional finish, always use aluminium channels with frosted diffuser covers. These spread the light evenly, hide the diodes, and also help dissipate heat, extending strip lifespan.
Channels come in various profiles: surface-mount, recessed, and corner-angled. Choose based on your mounting location and how visible the channel will be.
LED Drivers
LED strips run on low voltage (typically 12V or 24V DC), so they need a driver to convert mains power. Match the driver to your strip’s voltage and total wattage, with 20% headroom for safety.
Example: A 5-metre run of strip rated at 10W per metre needs a 50W minimum driver—realistically, choose 60W to allow headroom.
Position drivers somewhere accessible but hidden: inside a cabinet, above wall units, or in a utility space. They generate some heat, so ensure adequate ventilation.
Cutting and Connecting
Most strips have cut points every 25–50mm. Cut only at these marked points to avoid damaging the circuit. Use solderless connectors or solder joints to connect cut strips to power cables or to join sections.
For runs over 5 metres, voltage drop can cause the strip to dim toward the far end. Either run power from both ends or use a higher-voltage strip (24V handles longer runs better than 12V).
Hardwired vs Plug-In
Plug-in strips connect to a standard socket and can be controlled via an inline switch or smart plug. They’re suitable for renters or temporary installations but leave visible cables.
Hardwired installations connect strips directly to the lighting circuit, controlled by wall switches or smart systems. This is neater and more permanent but requires an electrician for UK compliance.
UK regulations require electrical work in kitchens to be carried out by a qualified electrician or certified under Part P of the Building Regulations.
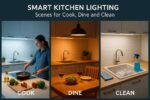
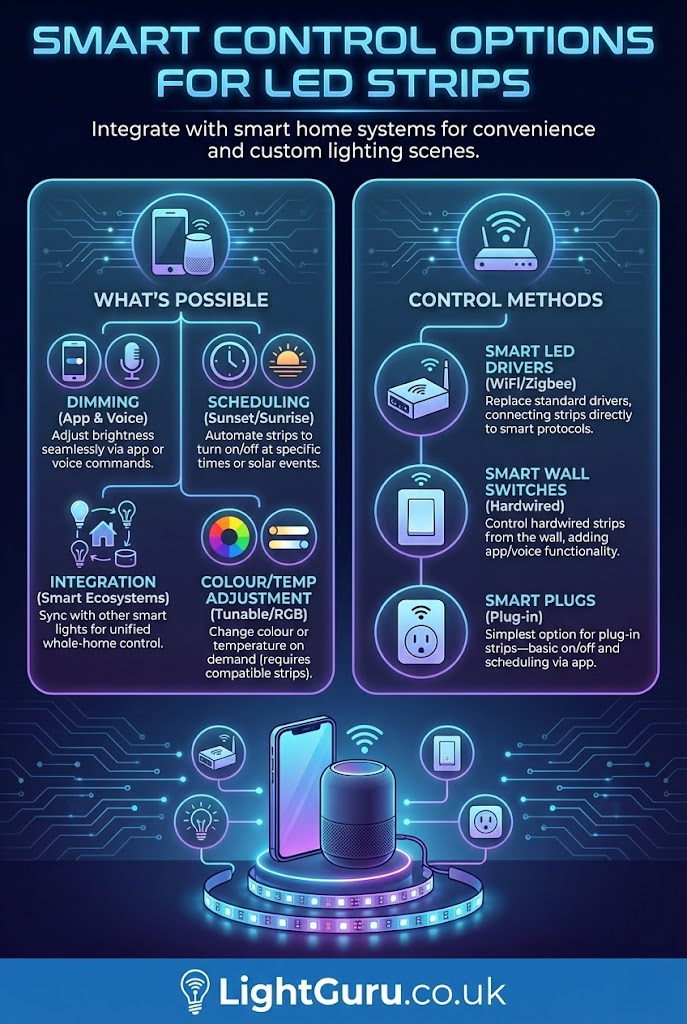
Smart Control Options
LED strips integrate well with smart home systems, offering convenient control and the ability to create lighting scenes.
What’s Possible
Dimming via app or voice control, scheduling (strips turn on at sunset), integration with other smart lights, and—with tunable or RGB strips—colour temperature adjustment on demand.
Control Methods
Smart LED drivers replace standard drivers and connect strips to WiFi, Zigbee, or other smart home protocols.
Smart switches control hardwired strips from the wall, with app and voice control added.
Smart plugs offer the simplest option for plug-in strips—basic on/off and scheduling via app.
For scene ideas, see our smart kitchen lighting scenes guide.
Kitchen-by-Kitchen Guidance
Small Kitchens
LED strips help small kitchens feel larger by adding brightness at worktop level and visual layers that draw the eye. Prioritise under-cabinet strips for task lighting and consider plinth lighting to create the illusion of floating cabinets.
Avoid cool white (4000K+) throughout—it can make small spaces feel stark. Stick to 3000K for warmth.
See our small kitchen lighting ideas for more guidance.
Galley Kitchens
In narrow galley layouts, under-cabinet strips on both sides are essential. They eliminate the shadow problems that make galley kitchens feel dark and cramped. Add plinth lighting for evening ambience and to visually widen the floor space.
See our galley kitchen lighting guide.
Dark Cabinetry
Kitchens with dark-coloured cabinets absorb light and can feel heavy. LED strips provide relief: bright under-cabinet lighting illuminates worktops, while plinth and cabinet-top strips add enough ambient glow to lift the overall feel.
Consider 3500–4000K under cabinets for maximum contrast against dark surfaces.
See our guide to lighting for dark cabinetry.

Open-Plan Kitchen-Diners
In open-plan spaces, LED strips help define the kitchen zone. Under-cabinet task lighting signals the working area, while plinth and display lighting can dim for evening use when the focus shifts to dining or living zones.
Use dimmers or smart control to shift between “cooking mode” (bright task lighting) and “evening mode” (soft accent lighting only).
Common Mistakes to Avoid
Skipping the diffuser: Bare strips look cheap and create glare. Always use aluminium channels with frosted covers for visible installations.
Wrong positioning under cabinets: Strips mounted at the back of the cabinet light the splashback, not the worktop. Position toward the front edge.
Too bright for the application: Plinth and display lighting should be subtle. Using task-brightness strips everywhere creates a harsh, over-lit effect.
Mismatched colour temperatures: Mixing 2700K accent strips with 4000K task strips looks disconnected. Stay within 500K across all sources.
Undersized drivers: A driver running at full capacity generates excess heat and may fail early. Always allow 20% headroom.
Ignoring the driver location: Drivers need ventilation and ideally should be accessible for future replacement. Don’t seal them inside cabinets with no airflow.
For more on what can go wrong, see our guide to kitchen lighting mistakes.
Quick Specification Guide
Under-Cabinet Task Lighting
- High-output LED strips at 400–800 lumens per metre
- 3000–3500K colour temperature
- CRI 90+ for accurate food colours
- Aluminium channel with frosted diffuser
Plinth Lighting
- 150–300 lumens per metre
- 2700–3000K (warm white)
- IP65 rated if near floor-level moisture
Cabinet-Top Ambient Lighting
- 300–500 lumens per metre
- 2700–3000K
- Position toward back, facing ceiling
Display Cabinet Lighting
- 200–400 lumens per metre
- 2700–3000K for warm glow
- Vertical or horizontal mounting
Frequently Asked Questions
Where should LED strips go in a kitchen?
The most useful location is under wall cabinets, illuminating the worktop for food preparation. Secondary locations include plinths (base cabinet kickboards), on top of wall cabinets, inside glass-fronted display units, and under open shelving.
How bright should kitchen LED strips be?
For under-cabinet task lighting, aim for 400–600 lumens per metre (or up to 1,000 lm/m if strips are your primary worktop light). For ambient applications like plinth and display lighting, 150–400 lumens per metre is sufficient.
What colour temperature is best for kitchen LED strips?
3000K (warm white) works well for most applications, balancing warmth with task visibility. Use 3500–4000K for under-cabinet task lighting if you prefer crisper light, and 2700K for purely ambient uses like plinth lighting.
Can I cut LED strips to fit?
Yes—most strips have marked cut points every 25–50mm. Cut only at these points to avoid damaging the circuit.
Are LED strips safe in kitchens?
Yes, when installed correctly. Use appropriate IP-rated strips near moisture, ensure drivers are properly ventilated, and have hardwired installations completed by a qualified electrician.
Do LED strips need a diffuser?
For a professional finish, yes. Bare strips show individual diode dots. Aluminium channels with frosted diffusers spread the light evenly and hide the light source.
Final Thoughts
LED strip lighting transforms kitchens from functional spaces into something more considered and layered. The key is matching brightness and placement to purpose: bright strips under cabinets for task lighting, subtle strips along plinths and in displays for ambient warmth.
Invest in quality strips with high CRI, use aluminium channels for a clean finish, match colour temperatures across your lighting scheme, and install dimmers for flexibility. Done well, LED strips add a level of polish that makes even modest kitchens feel thoughtfully designed.
For more ideas on lighting your whole kitchen, explore our complete Kitchen Lighting Guide.