
Most UK kitchens have at least one of these kitchen lighting mistakes. Some have five or six. The good news: every mistake on this list is fixable, usually without rewiring.
This guide covers the most common kitchen lighting mistakes and gives you practical fixes for each.
This guide focuses on troubleshooting common errors. For a complete plan on getting your layout right from the start, see our main Kitchen Lighting Guide.
This guide contains affiliate links. We may earn a small commission if you buy through them — at no extra cost to you.
Table of Contents
Mistake 1: Relying on One Ceiling Light
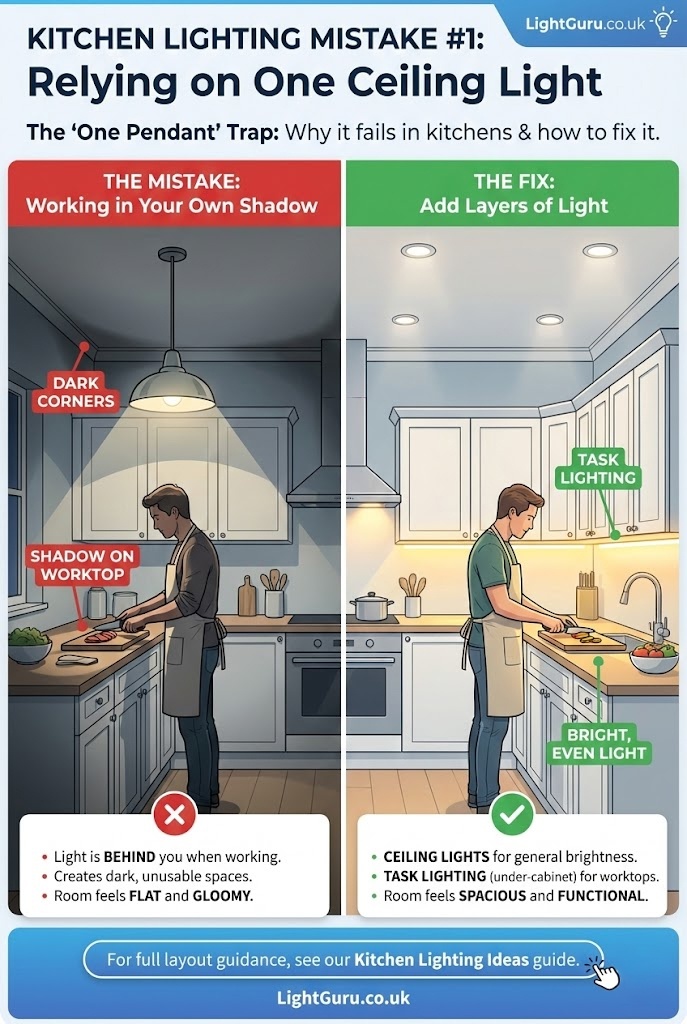
The classic British approach, one pendant in the middle of the room. It doesn’t work in kitchens, this is the most common kitchen lighting mistake in UK homes.
Why it’s a problem: You end up working in your own shadow. The light is behind you when you face the worktop, sink, or hob. Corners stay dark. The room feels flat.
The fix: Add layers. Kitchens need at least two types of lighting:
- Ceiling lights for general brightness (downlights or flush mounts)
- Task lighting for worktops (under-cabinet strips)
Adding pendants over an island or accent lighting around plinths takes it further, but even one extra layer makes a big difference.
For full layout guidance, see our Kitchen Lighting Ideas guide.
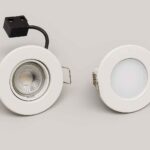
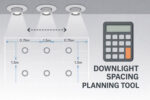
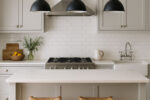
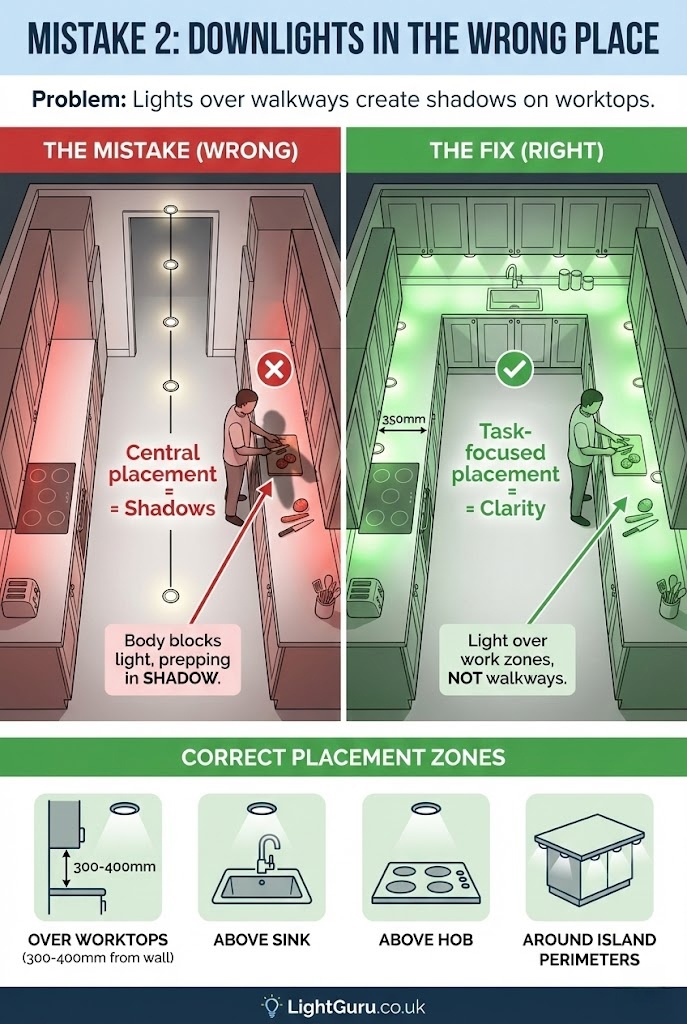
Mistake 2: Downlights in the Wrong Place
Downlights placed down the centre of the room light the floor, not your worktops. When you stand at the counter, your body blocks the light and you prep food in shadow.
The fix: Position downlights over work zones, not walkways:
- 300-400mm out from wall cabinets (directly over worktop edge)
- Above the sink
- Above the hob
- Around island perimeters
For spacing calculations and layout patterns, see our Kitchen Downlight Spacing Guide.
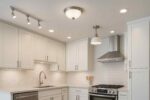
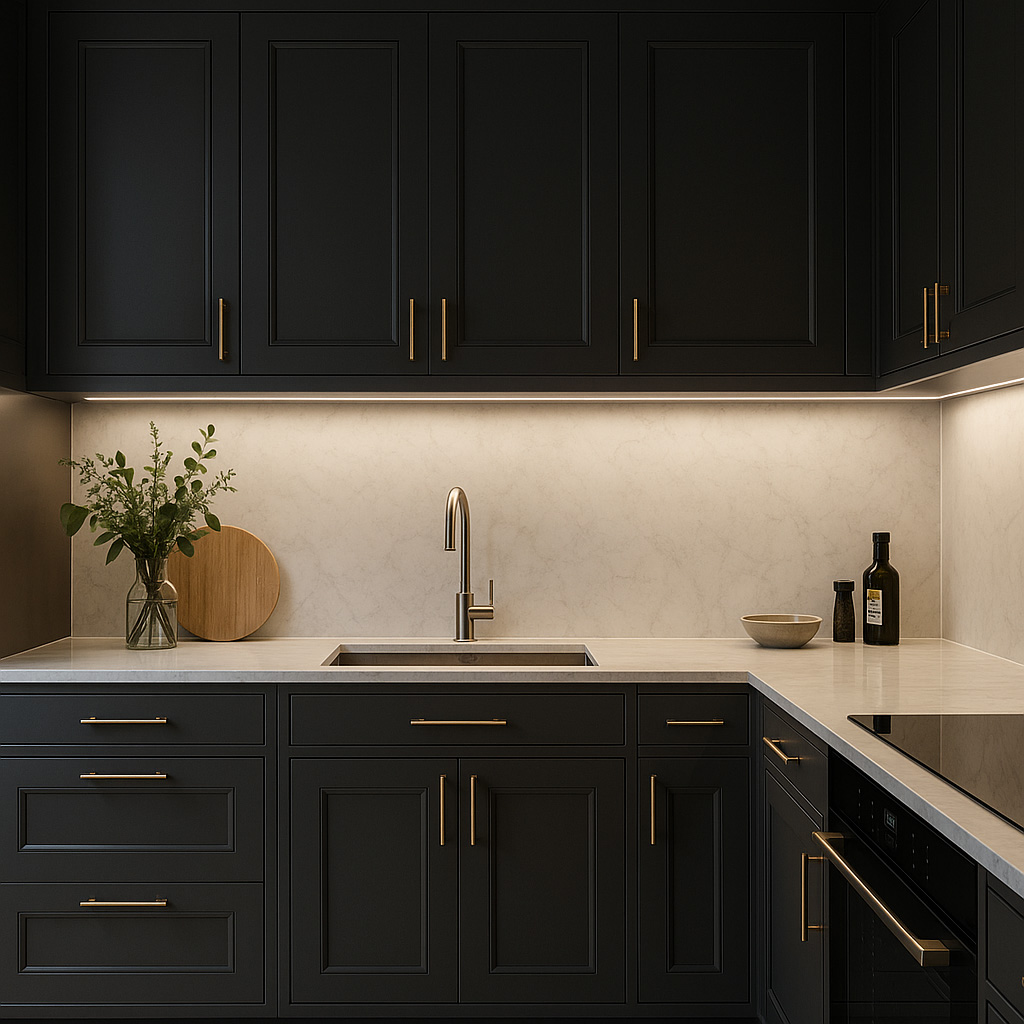
Mistake 3: No Under-Cabinet Lighting
Wall cabinets cast shadows on worktops. Ceiling lights can’t fix this — the cabinets block them. If you skip under-cabinet lighting, you’ll always have dark patches where you need light most.
The fix: Install LED strips or light bars under wall cabinets. Position them towards the front of the cabinet (not against the wall) so light falls on your hands and chopping board, not the splashback.
Continuous strips look cleaner than individual puck lights and give more even coverage.
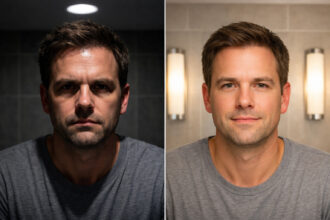
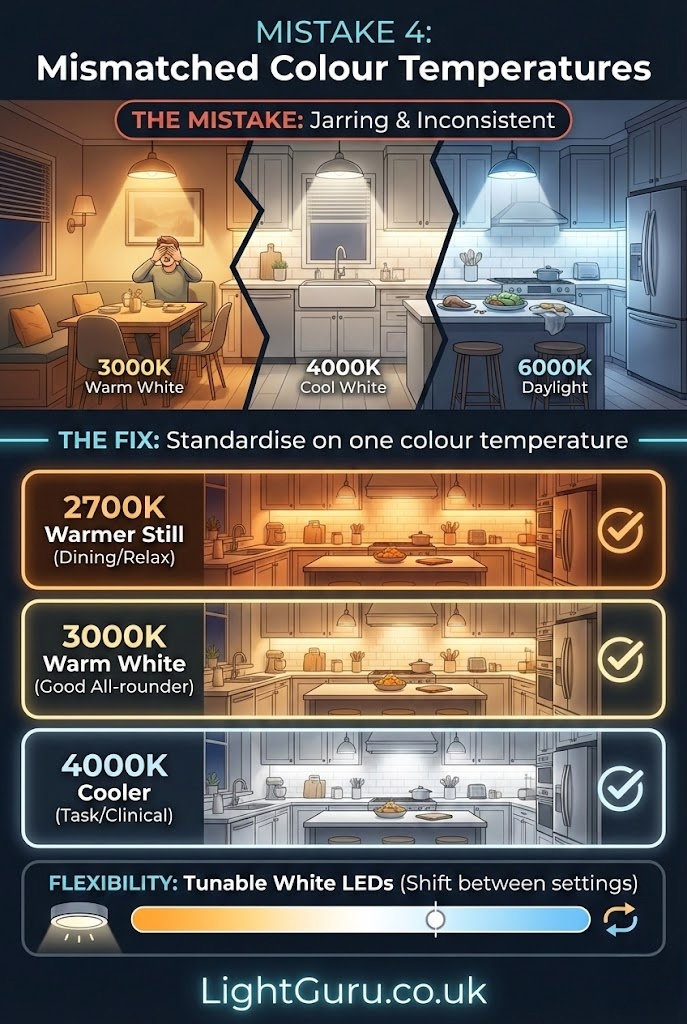
Mistake 4: Mismatched Colour Temperatures
If your kitchen feels “off” but you can’t pinpoint why, check your bulbs. Mixing 3000K, 4000K, and 6000K in the same room creates a jarring, inconsistent look.
The fix: Standardise on one colour temperature throughout:
- 3000K — warm white, good all-rounder for most kitchens
- 4000K — cooler, better for task-heavy or clinical spaces
- 2700K — warmer still, better for dining areas than prep zones
Pick one and stick to it. If you want flexibility, use tunable white LEDs that can shift between settings.
For more on colour temperature, see our Colour Temperature Guide.
Mistake 5: Going Too Cool
6000K “daylight” bulbs are harsh in kitchens. They make spaces feel clinical, wash out food colours, and show every imperfection in painted cabinets.
The fix: Stay at 4000K or below for kitchens. Most people find 3000K the best balance — warm enough to feel inviting, neutral enough for food prep.
If you’ve already installed cool white bulbs, swap them. It’s the cheapest upgrade you can make.

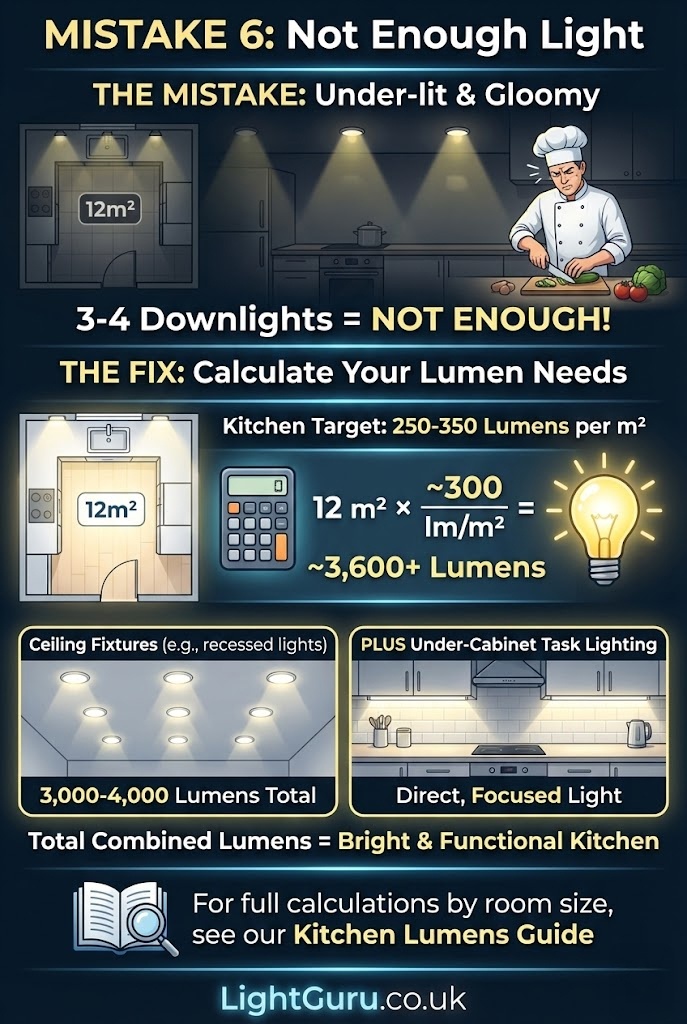
Mistake 6: Not Enough Light
Most UK kitchens are under-lit. Three or four downlights in a 12m² kitchen won’t cut it.
The fix: Calculate your lumen needs properly. Kitchens need 250-350 lumens per square metre — higher than living rooms or bedrooms.
A 12m² kitchen needs roughly 3,000-4,000 lumens total from ceiling fixtures, plus under-cabinet task lighting on top.
For full calculations by room size, see our Kitchen Lumens Guide.
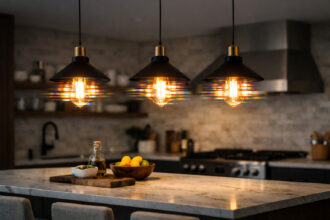
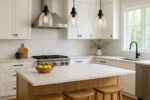
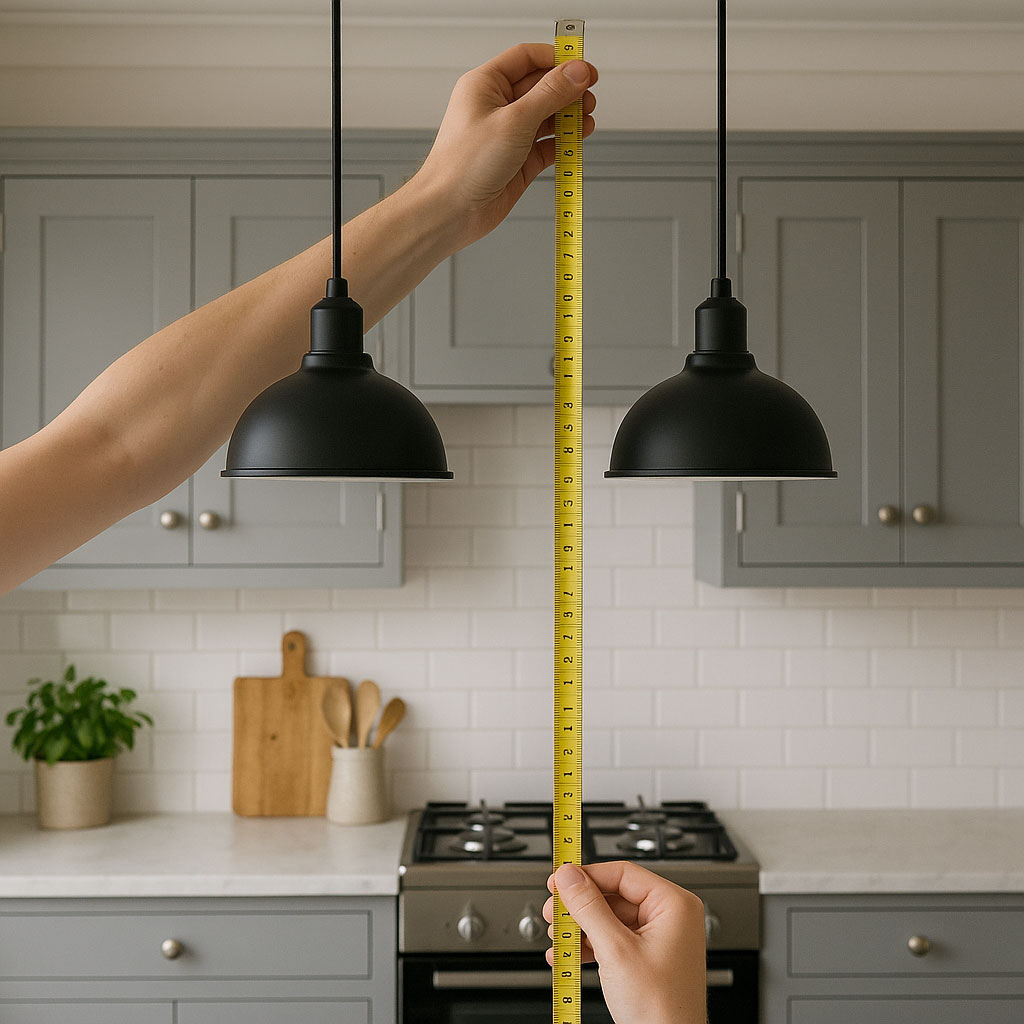
Mistake 7: Pendants at the Wrong Height
Pendants over islands look great, but height matters. Too low and they block sightlines, create glare, and get in the way. Too high and they look disconnected and don’t light the surface properly.
The fix: Standard pendant heights for UK kitchens:
- Over islands: 650-750mm from worktop surface to bottom of pendant
- Over dining tables: 700-800mm from table surface
Adjust slightly for very tall or short household members, but stay within these ranges.
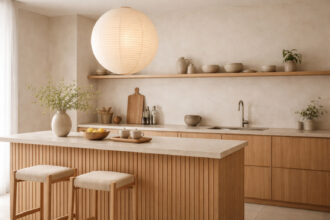
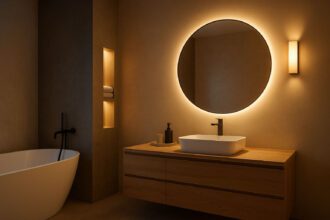
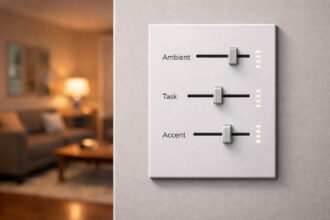
Mistake 8: Forgetting Accent Lighting
Task and ambient lighting cover function. Accent lighting adds depth and makes kitchens feel finished rather than flat.
The fix: Consider adding one or two accent layers:
- Plinth lighting — LED strips at floor level under kickboards
- Over-cabinet lighting — strips on top of wall units, pointing up
- In-cabinet lighting — inside glass-fronted cabinets
- Shelf lighting — for open shelving displays
These aren’t essential, but they’re what separate a good kitchen from a great one.
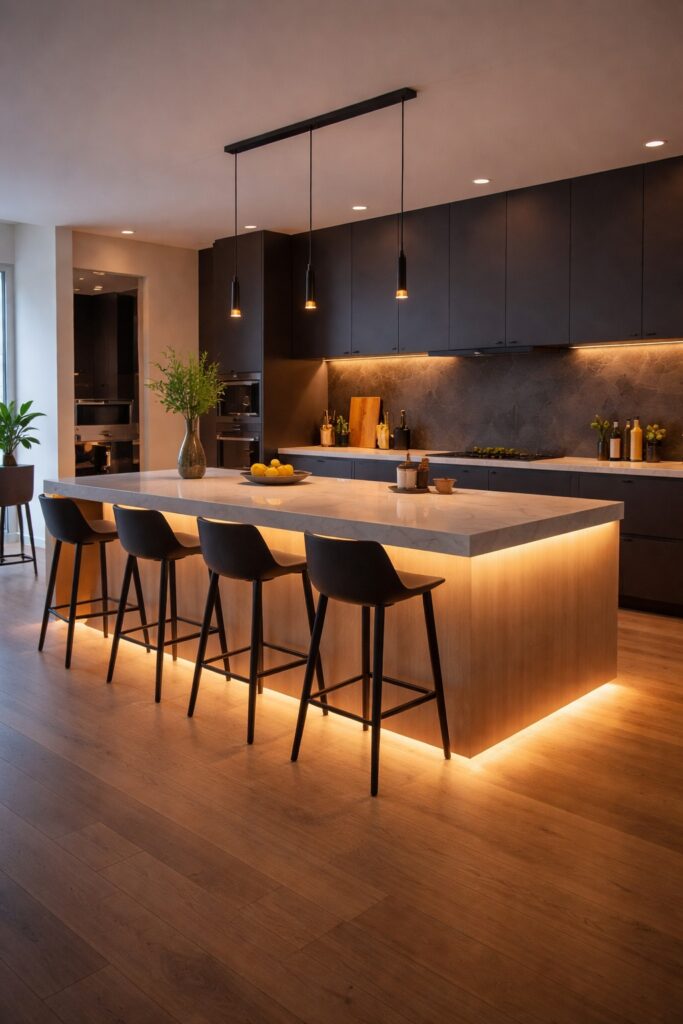
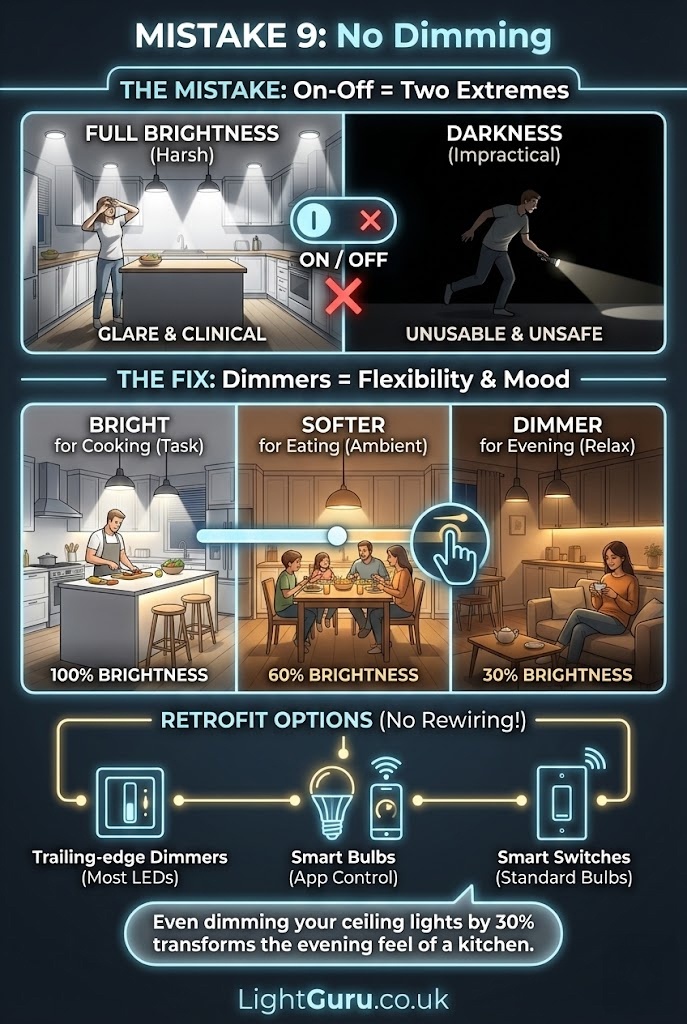
Mistake 9: No Dimming
On-off lighting gives you two options: full brightness or darkness. Kitchens need more flexibility than that — bright for cooking, softer for eating, dimmer for evening.
The fix: Install dimmers on your main circuits. For retrofit, use:
- Trailing-edge dimmers — compatible with most LEDs
- Smart bulbs — dimmable via app without rewiring
- Smart switches — replace existing switches, work with standard bulbs
Even dimming your ceiling lights by 30% transforms the evening feel of a kitchen.
For help choosing compatible dimmers, the Lighting Industry Association has useful guidance on LED dimming.
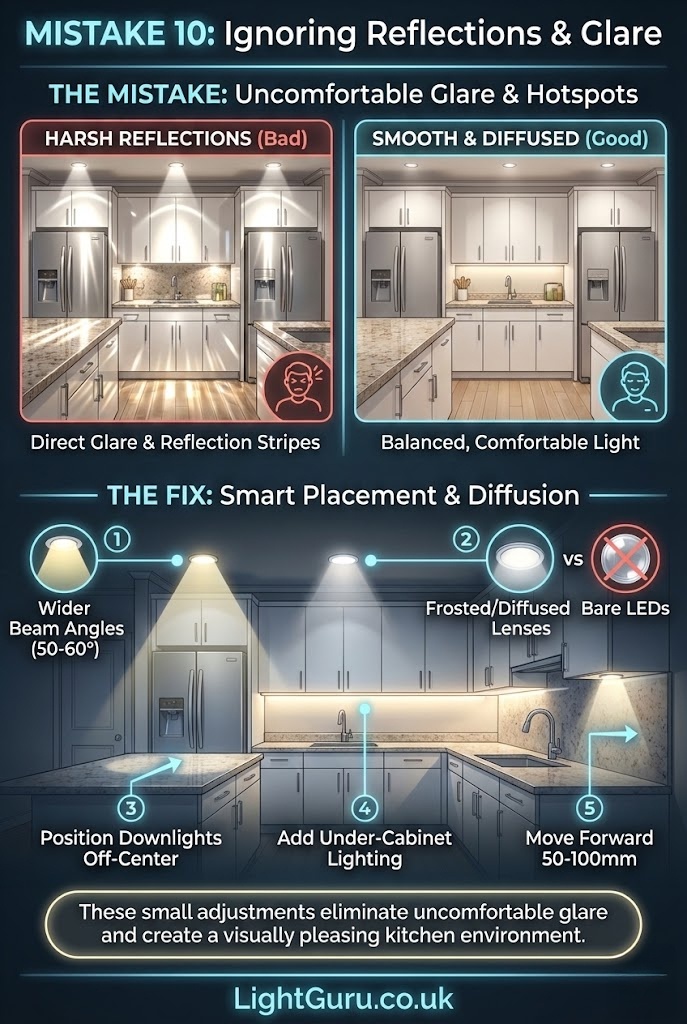
Mistake 10: Ignoring Reflections and Glare
Kitchens have reflective surfaces — gloss cabinets, polished worktops, splashbacks, stainless steel appliances. Poor lighting placement creates glare spots, reflection stripes, and uncomfortable bright patches.
The fix:
- Use wider beam angles (50-60°) to soften intensity
- Choose frosted or diffused lenses rather than bare LEDs
- Position downlights to avoid direct reflection off glossy horizontal surfaces
- Add under-cabinet lighting to reduce contrast between bright ceilings and dark worktops
If you’re getting glare off a splashback, the downlight is probably too close to the wall. Move it forward 50-100mm.
Quick Checklist: Avoiding Kitchen Lighting Mistakes
- Don’t rely on a single central light
- Position downlights over worktops, not walkways
- Always include under-cabinet task lighting
- Standardise colour temperature (3000K works for most)
- Avoid cool white (6000K) — it’s too harsh
- Calculate lumens properly (250-350 lm/m²)
- Hang pendants at the right height (650-750mm over islands)
- Add at least one accent layer (plinth, over-cabinet, or in-cabinet)
- Install dimmers on main circuits
- Check for glare and reflections on glossy surfaces
FAQs
What’s the most common kitchen lighting mistake?
Relying on a single ceiling light. It leaves worktops in shadow and makes the room feel flat.
How many lights does a kitchen need?
Depends on size, but most UK kitchens (10-15m²) need 5-8 ceiling fixtures plus under-cabinet strips. Use our Lumens Calculator to work out your specific needs.
What colour temperature is best for kitchens?
3000K for most. 4000K if you prefer a crisper, cooler look. Avoid 6000K unless you’re running a commercial kitchen.
Should kitchen lights be dimmable?
Yes. Kitchens serve multiple functions — cooking, eating, socialising — and each benefits from different light levels.
How do I fix glare from my downlights?
Switch to wider beam angles (50-60°), use frosted lenses, and check positioning. Downlights too close to walls bounce light off splashbacks.