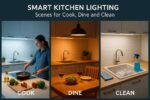

A well-lit kitchen needs to do more than one job. The light you want while chopping vegetables at seven in the morning is completely different from what you want over a dinner with friends at nine in the evening. Smart lighting lets you switch between those moods instantly — no rewiring, no swapping bulbs, just a tap on your phone or a voice command.
The key to getting smart kitchen lighting right is thinking in scenes. A scene is a preset combination of which lights are on, how bright they are, and what colour temperature they are set to. Instead of adjusting five different switches and dimmers every time you sit down to eat, you press one button and the whole room shifts.
This guide walks through six practical kitchen lighting scenes, explains exactly what hardware you need to build them, and covers the layering, mistakes, and compatibility questions that come up most often.
This article explores lighting from a style and inspiration perspective. For technical layout, brightness, and placement guidance, see our main kitchen lighting guide.
Table of Contents
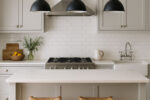
Cook Mode: Bright, Precise and Shadow-Free
Cook mode is your working light. Everything is on, everything is bright, and the priority is seeing clearly across every worktop, chopping board, and hob surface without shadows getting in the way.
What Cook Mode looks like
The goal is maximum visibility with accurate colour rendering. You need to see the difference between raw and cooked, spot that bit of onion skin on the worktop, and read recipe measurements without squinting. This is not the time for mood lighting.
Colour temperature
Set your main lights to 3000K for a warm but clear working light. If you prefer a crisper feel, 3500K works well, but avoid going above 4000K in a domestic kitchen — it starts to feel like a commercial unit. For more on choosing the right tone, see our colour temperature guide.
Which lights are active
All downlights at full brightness. Under-cabinet LED strips at full output — these are critical for eliminating the shadows that wall cabinets cast across your worktops. If you have island pendants, bring them to around 70 to 80 percent so they contribute without creating glare at eye level. Any directional track lighting should be angled toward prep surfaces.
Optional additions
A motion-activated light inside the pantry or under the sink saves you fumbling with switches when your hands are covered in flour. A smart plug controlling an extractor hood light can also be pulled into the scene so it activates automatically.
Hardware needed
Tunable white GU10 downlights (so the same fittings can shift to warmer tones for other scenes), a smart LED strip driver for under-cabinet lighting, and a smart switch or smart dimmer to group the downlight circuit. A motion sensor near the prep zone or bin area is a useful bonus.
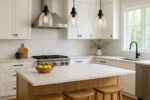
Dine Mode: Warm, Soft and Restaurant-Worthy
This is where the kitchen stops being a workspace and becomes somewhere you actually want to sit. The overhead brightness drops, the colour temperature warms up, and the light shifts to the areas that matter for a meal — the table, the island, and the ambient background.
What Dine Mode looks like
Soft, warm, and layered. The room should feel inviting rather than bright. Think of the lighting in a good restaurant — you can see your food and the people you are eating with clearly, but the room feels relaxed rather than exposed.
Colour temperature
Drop to 2700K for a golden, candlelit warmth. If 2700K feels too amber for your kitchen’s colour scheme (particularly in rooms with a lot of grey or cool-toned surfaces), 3000K at reduced brightness gives a similar warmth without the yellow cast.
Which lights are active
Island or dining pendants at 40 to 60 percent brightness — these become the primary light source. Downlights dimmed to 15 to 25 percent so the ceiling is not completely dark but the overhead glare is gone. Under-cabinet strips dimmed to around 10 percent, creating a gentle background glow rather than task lighting. If you have plinth lights, turn them on at a low level — they add a lovely depth to the room without drawing attention.
Hardware needed
Smart dimmers are essential for Dine Mode. You cannot get this effect with simple on/off smart switches. Smart bulbs in your pendant fittings give you independent colour temperature and brightness control. A smart LED strip driver with dimming capability handles the under-cabinet and plinth circuits. All of this gets saved as a single scene in your chosen app.
Clean Mode: Maximum Brightness, Zero Hiding Places
After cooking comes cleaning, and for that you need to see everything. Every splash on the backsplash, every crumb on the floor, every smear on the hob. Clean Mode is Cook Mode with the brightness turned up one more notch.
What Clean Mode looks like
Energising and clinical. This is the one scene where you might push the colour temperature slightly cooler for maximum clarity, though it is perfectly fine to keep it at the same 3000K as Cook Mode if you prefer consistency.
Colour temperature
3000K to 3500K. The slightly cooler end helps you spot grease and residue more easily, particularly on light-coloured worktops and splashbacks.
Which lights are active
Everything. All downlights at 100 percent, all under-cabinet strips at full, any track or directional spotlights on and aimed at surfaces. Pantry light on. Plinth lights off — they are a mood feature, not a cleaning aid, and having them on during a clean just means more surfaces collecting splashes.
Voice command integration
This is a great scene to trigger by voice since your hands are often wet or holding a cloth. Set it up as a simple command — “Alexa, clean mode” or “Hey Google, kitchen bright” — so you can activate it without touching anything.
Hardware needed
Smart switches grouping all circuits together, scenes configured in your app, and IP-rated LED strips near the sink area. Any strip within 60 centimetres of a water source should be IP65 or above.
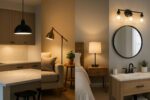
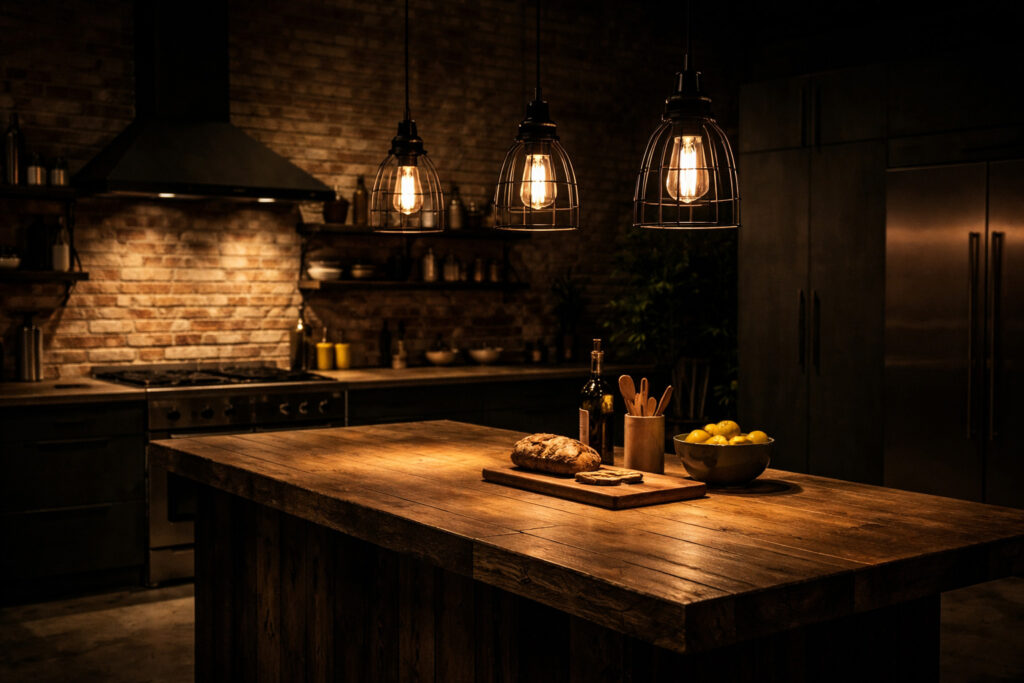
Late Night Mode: A Barely-There Glow
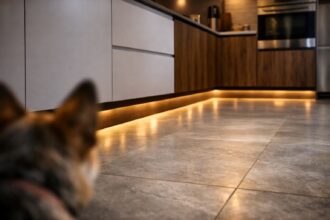
[Image: A dark kitchen at night with only plinth lighting and a faint warm glow from under-cabinet strips, providing just enough light to navigate safely without waking anyone up.]
The two o’clock water run. The baby bottle warm-up. The late-night snack. Whatever brings you to the kitchen after dark, you do not want the full array of downlights hitting you in the face.
What Late Night Mode looks like
Just enough light to see where you are going and what you are reaching for, with the warmest possible tone so it does not jolt you awake. The room should feel safe to move through but not “lit up.”
Colour temperature
2200K to 2700K. The very warm end of the spectrum mimics candlelight and has the least impact on your circadian rhythm, making it easier to fall back asleep afterwards.
Which lights are active
Plinth lights at a low level provide orientation — you can see the floor and the edges of the cabinets without looking directly at a light source. Under-cabinet strips at 5 to 10 percent give just enough glow to find a glass or fill a kettle. A single wall light on a very low dim can supplement if your kitchen does not have plinth or strip lighting.
Everything else stays off. No downlights, no pendants, no track lighting.
Motion sensor integration
This is the ideal scene for motion activation. A sensor in the kitchen doorway or near the worktop triggers Late Night Mode automatically after a set time (typically after 10pm), then turns everything off again after two to three minutes of no movement. Philips Hue motion sensors and Aqara sensors both handle this well and allow time-based rules so the same sensor triggers Cook Mode during the day and Late Night Mode after dark.
Hardware needed
Motion sensors with time-based scheduling, a smart LED strip driver with deep dimming capability (some cheap drivers cannot dim below 20 percent — check the spec), and smart plinth light control via a plug or dedicated controller.
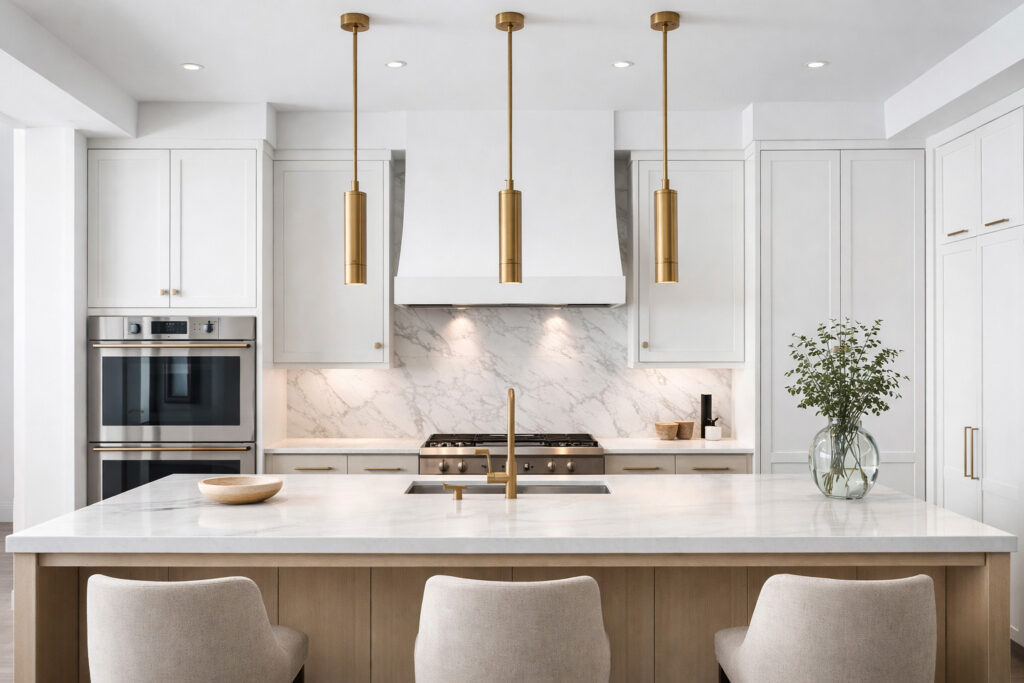
Morning Mode: A Gentle Wake-Up
[Image: A kitchen in early morning light with a few downlights on at reduced brightness and a warm glow around the coffee station area, calm and understated.]
The kitchen at seven in the morning does not need to look like an operating theatre. Morning Mode gives you enough light to make coffee, find what you need, and start the day without being overwhelmed.
What Morning Mode looks like
Warm, restrained, and focused around the areas you actually use first thing — typically the kettle, the coffee machine, and the fridge.
Colour temperature
3000K. Warm enough to feel comfortable, bright enough to function. Avoid anything below 2700K in the morning as it can feel sluggish rather than cosy.
Which lights are active
Two or three downlights in the area near your coffee station or breakfast zone, at around 50 to 60 percent brightness. Under-cabinet strips at 20 percent. Pendants off or at a very low level. No plinth lights — they are an evening feature.
Automation
Morning Mode is the best candidate for scheduling. Set it to activate at your usual wake-up time so the kitchen is ready when you walk in. Most smart lighting apps (Hue, Tapo, Lutron, Apple Home) support time-based triggers. You can also build a sunrise simulation that gradually increases brightness over 15 to 20 minutes.
Hardware needed
Scheduled scenes in your app, smart switches or bulbs with timer support, and a reliable smart home hub or Wi-Fi connection for consistent triggering.
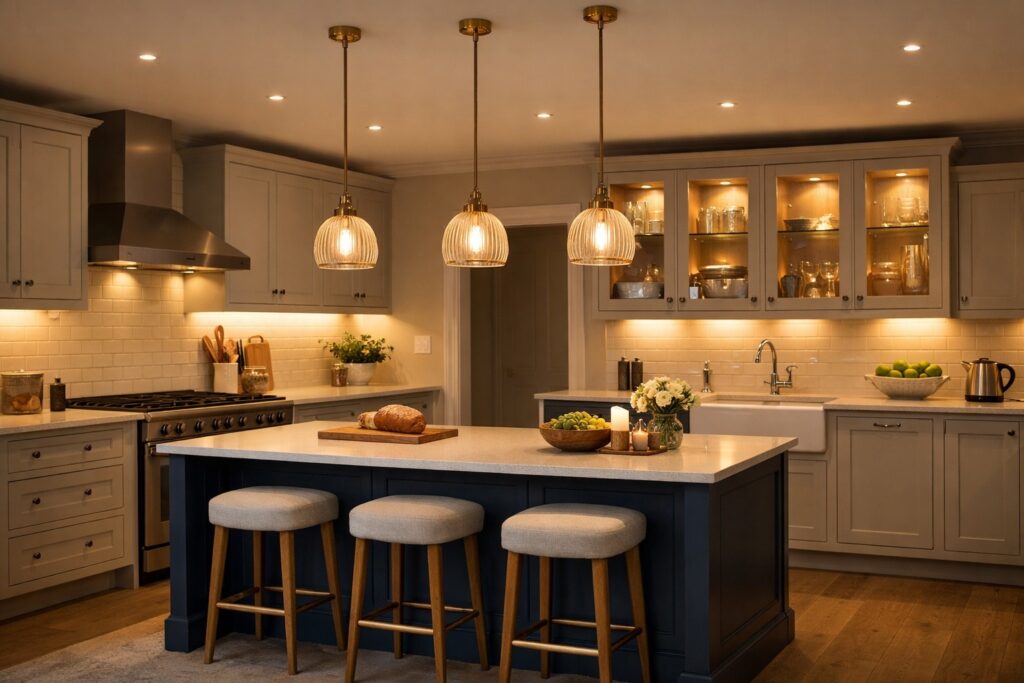
Entertain Mode: Ambient Layers for Guests
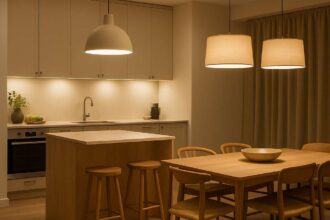
[Image: A kitchen during an evening gathering with pendant lights at low brightness, warm plinth lighting, softly lit open shelving, and no harsh overhead downlights.]
When you have guests, the kitchen becomes social space. The priority shifts from function to atmosphere — you want warmth, visual interest, and a room that feels inviting without any single light source dominating.
What Entertain Mode looks like
Similar to Dine Mode but with more emphasis on accent and background lighting. The overhead lights step back, and the lower, softer sources do the heavy lifting.
Colour temperature
2700K to 3000K throughout. Consistency matters here — mismatched colour temperatures across different fittings look messy when people are actually paying attention to the room.
Which lights are active
Pendants at 30 to 40 percent. Wall lights on. Plinth lights on at a low glow. Under-cabinet strips at 10 to 15 percent. Open shelving lights or display cabinet lighting if you have it. Downlights either off entirely or dimmed to 10 percent just to prevent the ceiling from feeling like a dark void.
The difference from Dine Mode
Dine Mode focuses light on the table or island where food is served. Entertain Mode spreads the warmth more evenly across the room, with slightly more accent lighting active (shelves, displays, plinths) to give guests something visually interesting as they move around.
Hardware needed
Multi-zone dimming so you can control pendants, downlights, strips, and accents independently. Smart bulbs in any decorative fixtures. Tunable white capability is a bonus for fine-tuning warmth across the room.
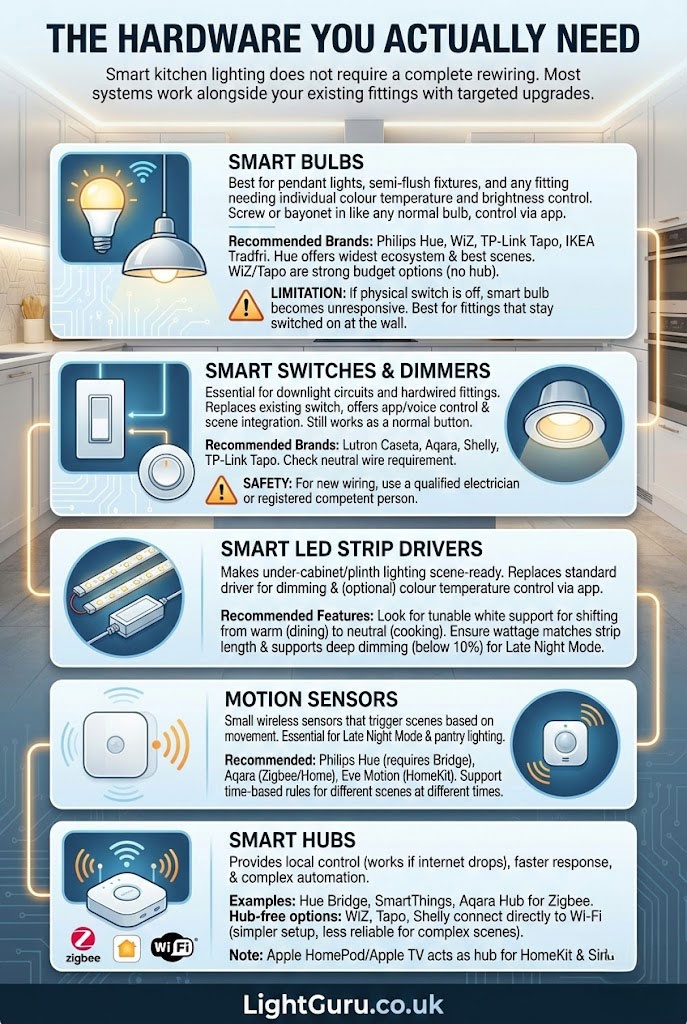
The Hardware You Actually Need
Smart kitchen lighting does not require a complete rewiring. Most systems work alongside your existing fittings with a few targeted upgrades.
Smart bulbs
Best for pendant lights, semi-flush fixtures, and any fitting where you want individual colour temperature and brightness control. Screw or bayonet them in like any normal bulb, then control through an app.
Recommended brands: Philips Hue, WiZ, TP-Link Tapo, IKEA Tradfri. Hue offers the widest ecosystem and best scene control. WiZ and Tapo are strong budget options that work without a hub.
The main limitation is that if someone turns the physical wall switch off, the smart bulb loses power and becomes unresponsive until the switch is flipped back on. This is why smart bulbs work best in fittings that stay switched on at the wall, with control handled through the app or voice.
Smart switches and dimmers
Essential for downlight circuits and hardwired fittings where smart bulbs are not practical. A smart dimmer replaces your existing wall switch and gives you app control, voice control, and scene integration while still working as a normal switch for anyone who just wants to press a button.
Recommended brands: Lutron Caseta, Aqara, Shelly, TP-Link Tapo. Check whether your existing wiring includes a neutral wire — some smart switches require one, while others (like Lutron Caseta and some Aqara models) work without.
For any switch installation involving new wiring, use a qualified electrician or registered competent person.
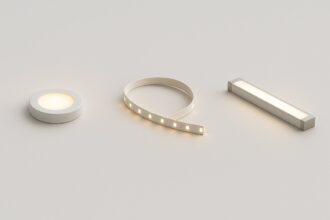
Smart LED strip drivers
These are what make your under-cabinet and plinth lighting scene-ready. A smart driver replaces the standard transformer or driver that powers your LED strips, giving you dimming and (in some cases) colour temperature control through your app.
Look for drivers that support tunable white if you want your strips to shift from warm for dining to neutral for cooking. Check the wattage rating matches your total strip length, and confirm it supports deep dimming (below 10 percent) if you want Late Night Mode to work properly.
Motion sensors
Small wireless sensors that trigger scenes based on movement. Essential for Late Night Mode and useful for pantry lighting.
Recommended: Philips Hue motion sensor (requires Hue Bridge), Aqara motion sensor (works with Zigbee hubs or Apple Home), Eve Motion (Apple HomeKit only). All of these support time-based rules so the same sensor can trigger different scenes at different times of day.
Smart hubs
A hub gives you local control (scenes work even if your internet drops), faster response times, and more complex automation. You need one for Philips Hue (the Hue Bridge) and Zigbee-based devices (SmartThings, Aqara Hub).
Hub-free options like WiZ, Tapo, and some Shelly devices connect directly to your Wi-Fi network. These are simpler to set up but slightly less reliable for complex multi-device scenes.
For Apple households, a HomePod or Apple TV acts as a hub for HomeKit-compatible devices and gives you Siri control plus automation through the Home app.
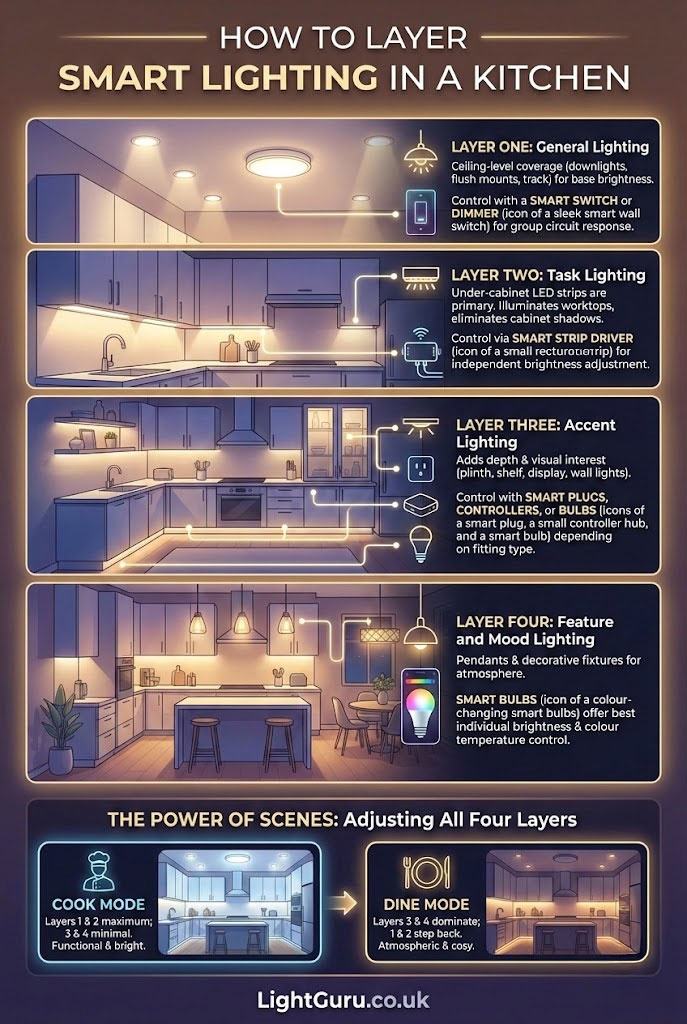
How to Layer Smart Lighting in a Kitchen
Smart lighting is most effective when you think of it in layers, with each layer serving a different purpose and controlled independently.
Layer one: General lighting
This is your ceiling-level coverage — downlights, flush mounts, or track lighting. It provides the base brightness for the room. Control this layer with a smart switch or smart dimmer so the entire circuit responds as one group.
Layer two: Task lighting
Under-cabinet LED strips are the primary task light in most kitchens. They illuminate your worktops directly and eliminate the shadows cast by wall cabinets. Control this layer through a smart strip driver so you can adjust brightness independently of the ceiling lights.
Layer three: Accent lighting
Plinth lights, shelf lights, display cabinet lighting, and any wall lights fall into this category. They add depth and visual interest without contributing much functional brightness. Control through smart plugs, dedicated smart controllers, or smart bulbs depending on the fitting type.
Layer four: Feature and mood lighting
Pendant lights and any decorative fixtures that you want to adjust for atmosphere. Smart bulbs are usually the best option here because they give you both brightness and colour temperature control at the individual fitting level.
The power of scenes comes from adjusting all four layers simultaneously. Cook Mode might set layers one and two to maximum while keeping three and four minimal. Dine Mode reverses the priority — layers three and four dominate while one and two step back.
Setting Up Scenes Step by Step
If you have never created a lighting scene before, the process is straightforward regardless of which ecosystem you are using.
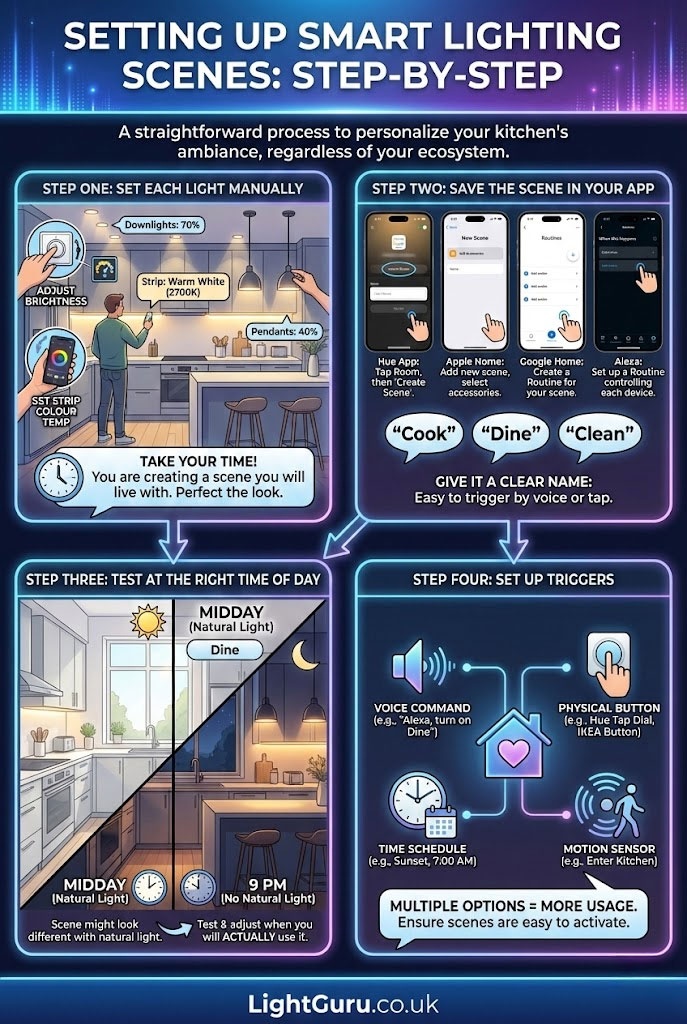
Step one: Set each light manually
Walk through the kitchen and adjust every smart light to where you want it for the scene you are building. Set the downlights to the right brightness, adjust the strip colour temperature, dim the pendants. Take your time — you are looking at this scene for as long as you use it.
Step two: Save the scene in your app
In the Philips Hue app, tap the room, then “Create Scene.” In the Apple Home app, add a new scene and select the accessories. In Google Home, create a routine. In Amazon Alexa, set up a routine that controls each device. Give the scene a clear name — “Cook,” “Dine,” “Clean” — so it is easy to trigger by voice.
Step three: Test at the right time of day
A scene that looks perfect at midday might feel completely different at 9pm when there is no natural light supplementing it. Test each scene during the time of day you will actually use it and adjust accordingly.
Step four: Set up triggers
Assign each scene to a voice command, a physical smart button (Hue Tap Dial, IKEA Shortcut Button), a time schedule, or a motion sensor. Having multiple trigger options means the scenes get used rather than forgotten.
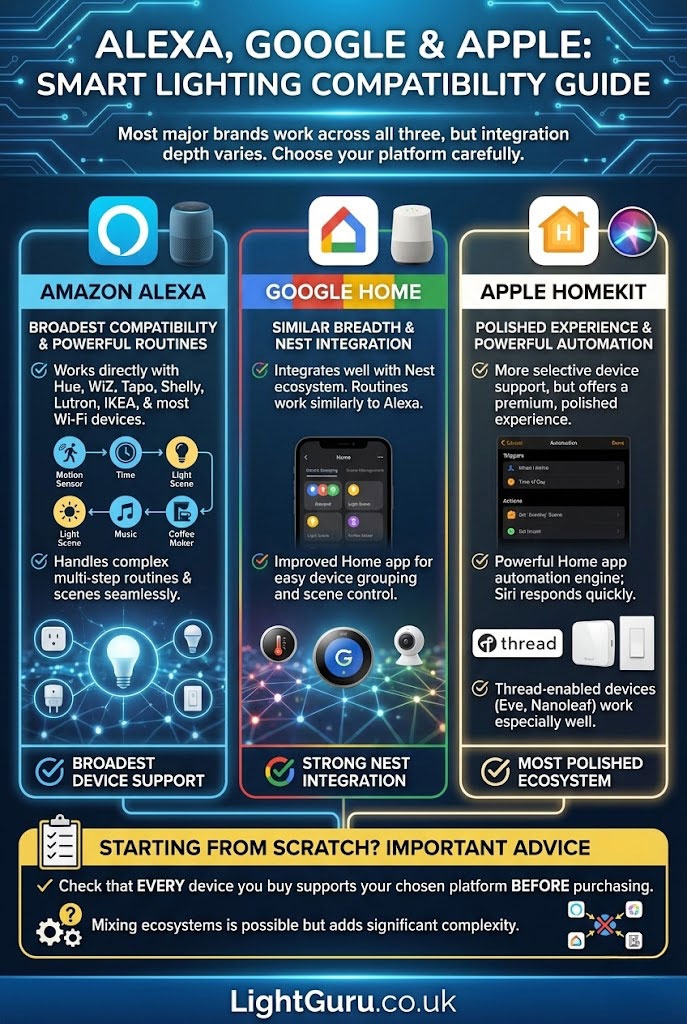
Alexa, Google and Apple Compatibility
Most major smart lighting brands work across all three voice platforms, but the depth of integration varies.
Amazon Alexa has the broadest device compatibility and handles routines (including multi-step scenes) well. It works with Hue, WiZ, Tapo, Shelly, Lutron, IKEA, and most Wi-Fi devices directly.
Google Home offers similar breadth and integrates well with Nest devices if you are already in that ecosystem. Routines work similarly to Alexa. The Google Home app has improved significantly for device grouping and scene management.
Apple HomeKit is more selective about which devices it supports but offers the most polished experience if everything in your kitchen is HomeKit-compatible. The Home app’s automation engine is powerful, and Siri responds quickly to scene commands. Thread-enabled devices (like Eve and newer Nanoleaf products) work especially well.
If you are starting from scratch, check that every device you buy supports your chosen platform before purchasing. Mixing ecosystems is possible but adds complexity.
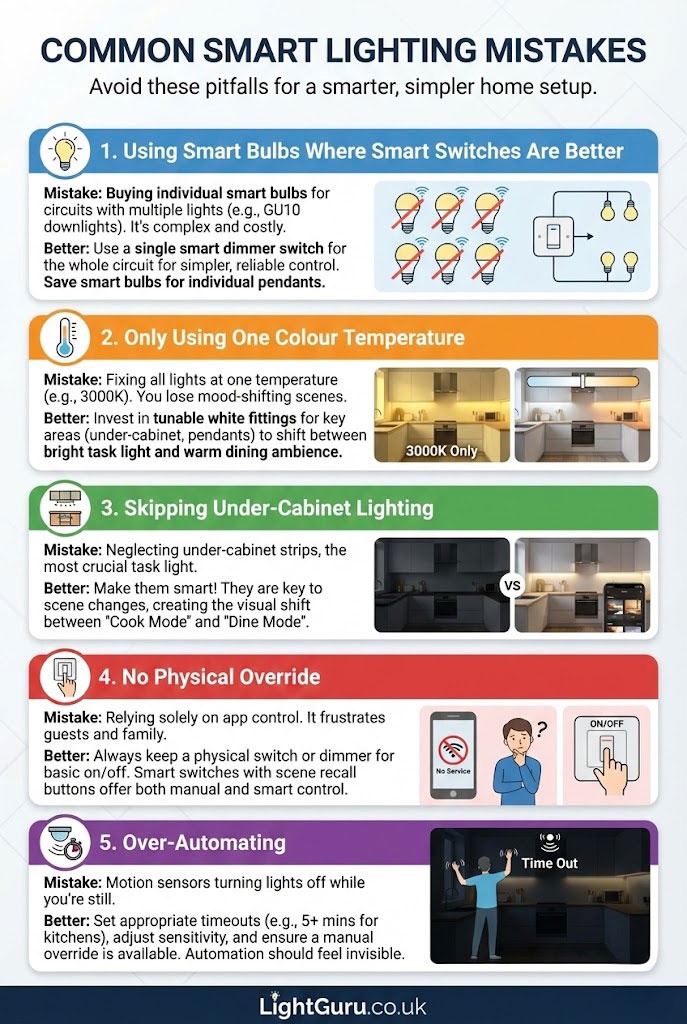
Common Smart Lighting Mistakes
Using smart bulbs where smart switches would be better
If your downlights use GU10 bulbs and you have six of them in the kitchen, that is six individual smart bulbs to buy, update, and manage. A single smart dimmer switch controlling the whole circuit is simpler, cheaper, and more reliable. Save smart bulbs for pendants and decorative fixtures where individual control matters.
Only using one colour temperature
The whole point of smart lighting scenes is that the colour temperature shifts with the mood. If every light in the kitchen is fixed at 3000K, you lose the ability to create a warm dining atmosphere or a bright cleaning environment. Invest in tunable white fittings where it matters most — under-cabinet strips and pendant bulbs.
Skipping under-cabinet lighting
Under-cabinet strips are the single most important task light in a kitchen, and making them smart is what unlocks the difference between Cook Mode and Dine Mode. Without them, your scenes will feel flat because the main visual shift between cooking light and dining light happens at worktop level.
No physical override
If the only way to turn on the kitchen lights is through an app, you will frustrate every guest, family member, and tradesperson who walks into the room. Keep a physical switch or dimmer for basic on/off control, with scenes as the smart layer on top. Smart switches with scene recall buttons handle this well — a single press turns the lights on at a default level, while holding or double-pressing activates a specific scene.
Over-automating
Motion sensors that turn the lights off while you are standing still at the hob are a genuine problem. Set appropriate timeout periods (at least five minutes for kitchen sensors), use sensors with adjustable sensitivity, and always keep a manual override available. Automation should feel invisible — the moment you notice it working against you, it needs adjusting.
Buyer’s Checklists
For Cook Mode
Tunable white GU10 downlights rated at 3000K to 3500K, CRI 90 or above, smart switch or dimmer for the downlight circuit, smart LED strip driver for under-cabinet lighting at full output.
For Dine Mode
Smart bulbs in pendant fittings with dimming to 2700K, smart dimmer for the downlight circuit (dimming to 15 to 25 percent), smart strip driver capable of deep dimming and warm colour shift.
For Clean Mode
All circuits grouped in a single scene at 100 percent output, IP65-rated strips near sinks, voice command routine configured for hands-free activation.
For Late Night Mode
Motion sensor with time-based scheduling, smart plinth light controller, LED strip driver capable of dimming below 10 percent, 2200K to 2700K warm tone.
For Morning Mode
Scheduled scene in your app, smart switches or bulbs with timer support, reliable hub or Wi-Fi for consistent automated triggering.
For Entertain Mode
Multi-zone dimming across at least three layers (pendants, downlights, accent), tunable white capability, consistent 2700K to 3000K across all active fixtures.
FAQs
Do I need smart bulbs or smart switches for kitchen lighting?
Most kitchens benefit from both. Smart switches are the better choice for downlight circuits — they control the whole group from one device, cost less per fitting, and still work as a normal switch when someone just wants to press the button. Smart bulbs are better for pendant lights and decorative fixtures where you want individual control over brightness and colour temperature. The combination gives you full scene flexibility without overcomplicating the setup.
What is the best colour temperature for smart kitchen scenes?
It depends on the scene. For cooking and cleaning, 3000K to 3500K gives you a clear, warm working light. For dining and entertaining, 2700K creates a softer, more intimate tone. For late night use, 2200K to 2700K is the least disruptive to your sleep. The ability to shift between these is the main reason to choose tunable white fittings.
Can I make my existing under-cabinet lights smart?
In most cases, yes. If your under-cabinet strips run from a plug-in driver, you can replace the driver with a smart version or put the existing driver on a smart plug. If they are hardwired, a smart LED strip driver that replaces the existing transformer gives you app and voice control. Check the wattage and voltage match before swapping. See our under-cabinet lighting guide for specific product recommendations.
Does smart lighting use more energy than normal lighting?
No. The LED fittings themselves use the same energy whether they are smart or not. Smart controllers add a very small standby draw (typically 0.5 to 1 watt) but this is offset many times over by the energy savings from dimming — a downlight dimmed to 20 percent for Dine Mode uses significantly less power than running at full brightness. Scheduled scenes that turn lights off automatically when you leave the kitchen can also reduce overall consumption.
Is smart lighting safe near sinks and hobs?
Yes, provided you use fittings and strips with the appropriate IP rating. IP65 is recommended for any LED strip within 60 centimetres of a water source. Smart controllers and drivers should be mounted in dry locations, away from direct water or steam exposure. The smart control element (the app, the voice command, the sensor) is separate from the fitting itself, so the same electrical safety rules apply as with any kitchen lighting. Check that any new wiring is carried out by a registered competent person.
Which smart lighting system is best for kitchens?
Philips Hue offers the widest range of products, the best scene management, and the most reliable automation. It requires the Hue Bridge hub but the ecosystem covers bulbs, strips, switches, sensors, and dimmers. For a more budget-friendly approach, TP-Link Tapo and WiZ both offer solid performance without a hub. If you are an Apple household, HomeKit-compatible devices with a HomePod as hub give excellent Siri integration and fast local control. The best system is whichever one matches the voice assistant and ecosystem you already use.
Can I control smart kitchen lights when I am not at home?
Yes. All major smart lighting platforms offer remote control through their mobile apps, provided the lights are connected to your home Wi-Fi and (for hub-based systems) the hub is online. This is useful for turning lights on before you arrive home, checking that everything is off after you leave, or adjusting scenes remotely. Some systems also support geofencing, which can trigger a welcome scene automatically when your phone detects you are approaching home.
How many smart devices do I need for a basic kitchen setup?
A practical starting point for most UK kitchens is three to four smart devices: a smart dimmer switch for the downlight circuit, a smart LED strip driver for under-cabinet lighting, one or two smart bulbs for pendant fixtures, and optionally a motion sensor. This gives you enough independent control to create distinct Cook, Dine, Clean, and Late Night scenes without overcomplicating the setup or the budget.
Conclusion
Smart kitchen lighting is not about filling your kitchen with gadgets. It is about setting up a handful of scenes that let the same room work properly for every job it needs to do — bright and focused for cooking, warm and soft for dining, fully lit for cleaning, and barely there for a midnight glass of water.
Start with the scenes that matter most to you, invest in the right hardware for each layer, and build from there. Most kitchens only need three or four smart devices to make a noticeable difference.
For the full picture on kitchen lighting including layout planning, fixture types, and technical guidance, see our complete kitchen lighting guide.