This guide focuses on under-cabinet task lighting for kitchen worktops. For broader lighting principles and fixture types, see our complete Kitchen Lighting Guide.
Table of Contents
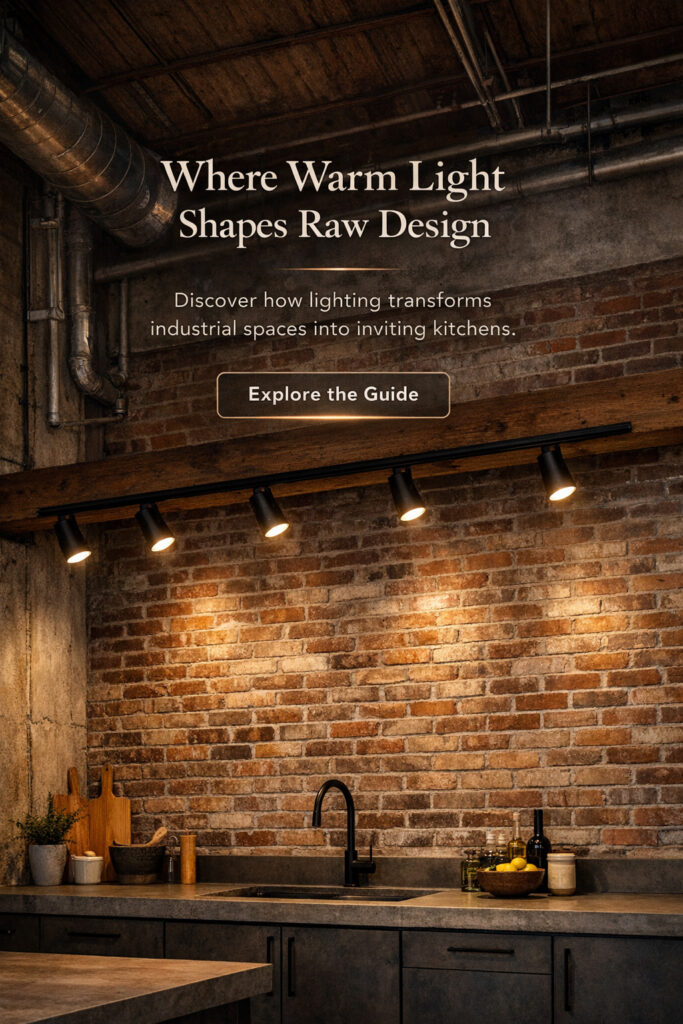
Why Under-Cabinet Lighting Matters
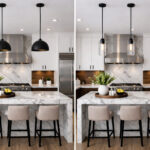
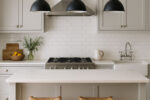
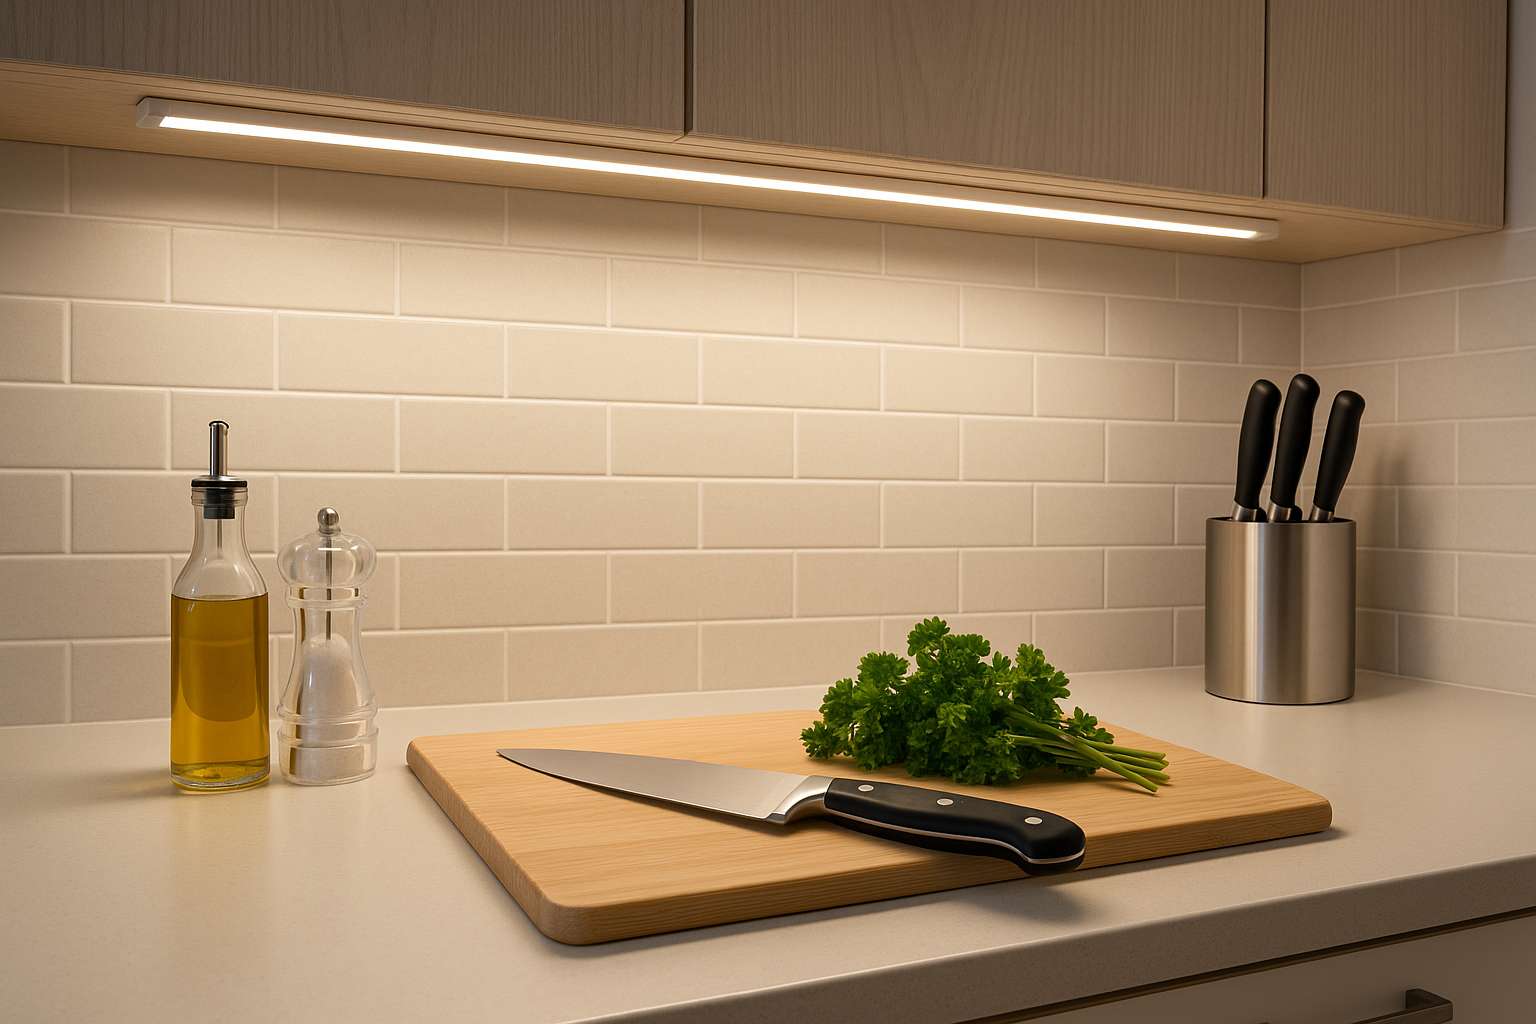
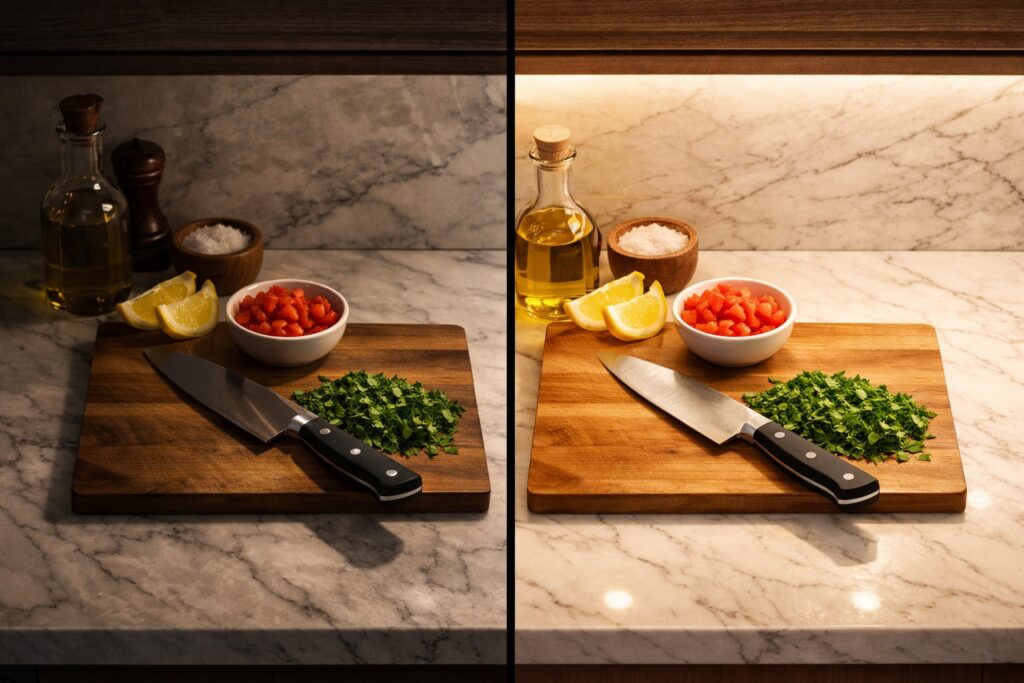
Ceiling lights sit behind you while you work at the worktop. The result is predictable: you cast a shadow exactly where you need to see. Under-cabinet lighting solves this by bringing light forward, illuminating the work surface from the front rather than from above and behind.
This isn’t a luxury upgrade—it’s one of the most practical improvements you can make in a kitchen. The difference is immediate and significant: shadows disappear, food prep becomes easier, and the whole space feels more finished.
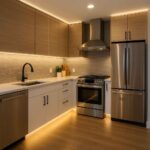
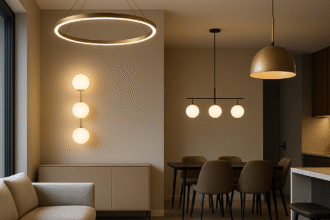
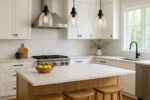
Beyond task lighting, under-cabinet strips add a sense of quality to the room. Even modest kitchens look more considered when there’s a clean line of warm light grazing the splashback. And at night, dimmed under-cabinet lighting doubles as a gentle glow for late trips to the fridge.
LED Strips vs Pucks vs Linear Bars
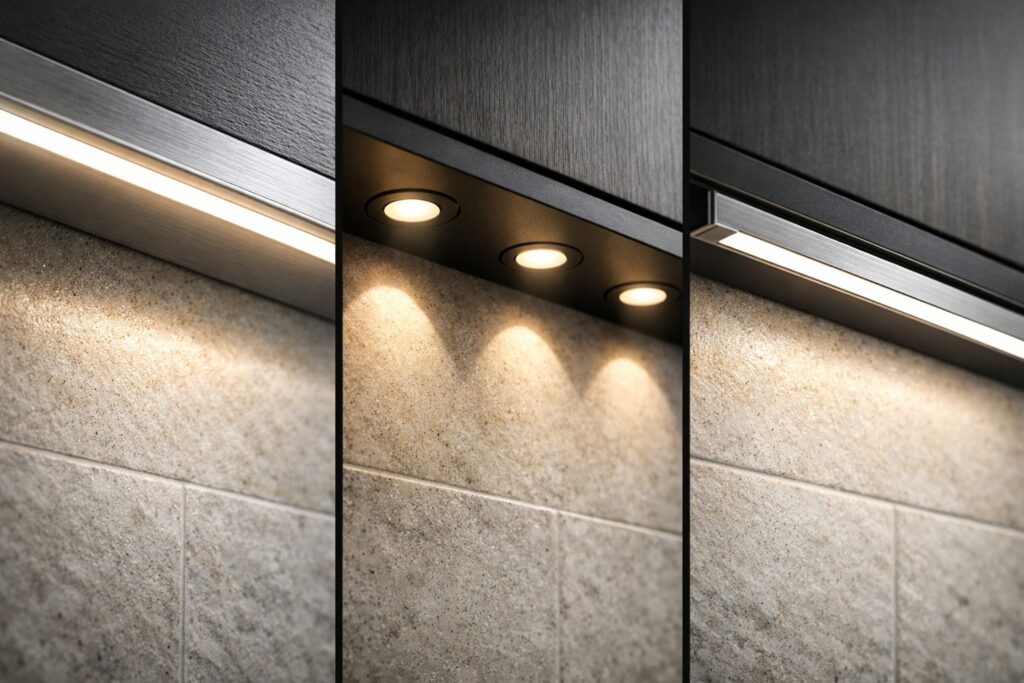
The three main options for under-cabinet lighting each have distinct characteristics. Your choice depends on the look you want and how much installation work you’re prepared to do.
LED Strip Lights
Strip lights are the most popular choice for modern kitchens, and for good reason. They provide continuous, even illumination along the full length of your cabinets with no gaps or dark spots.
Advantages: Seamless light output, slim profile that hides easily, widely available in different colour temperatures and brightness levels, compatible with dimmers and smart controls.
Considerations: Bare LED strips can show individual diode dots, which looks cheap. For a professional finish, house them in aluminium channels with diffuser covers. Budget strips may have inconsistent colour or visible hotspots.
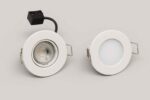
LED Puck Lights
Puck lights are round, self-contained units that mount individually under cabinets. They were the standard choice before LED strips became affordable, and they still appear in many kitchens.
Advantages: Simple installation (often battery-powered or plug-in), inexpensive, easy to reposition.
Considerations: They create pools of light rather than continuous coverage, which means shadows between each puck. The circular light pattern can look dated in contemporary kitchens. Not ideal if shadow-free task lighting is the priority.
Linear Bars
Linear bars are rigid, self-contained light fixtures—essentially a complete unit rather than flexible tape. They sit between strips and pucks in terms of finish and ease of installation.
Advantages: More robust than strips, consistent light output, easier to install than strips if you want to avoid cutting and soldering.
Considerations: Less flexibility in length (you’re limited to standard sizes), visible fixture body unless well concealed, cable routing can be more complex.
For a detailed comparison of all three options, see our guide to puck vs strip vs linear under-cabinet lighting.
The Shadow-Free Placement Method
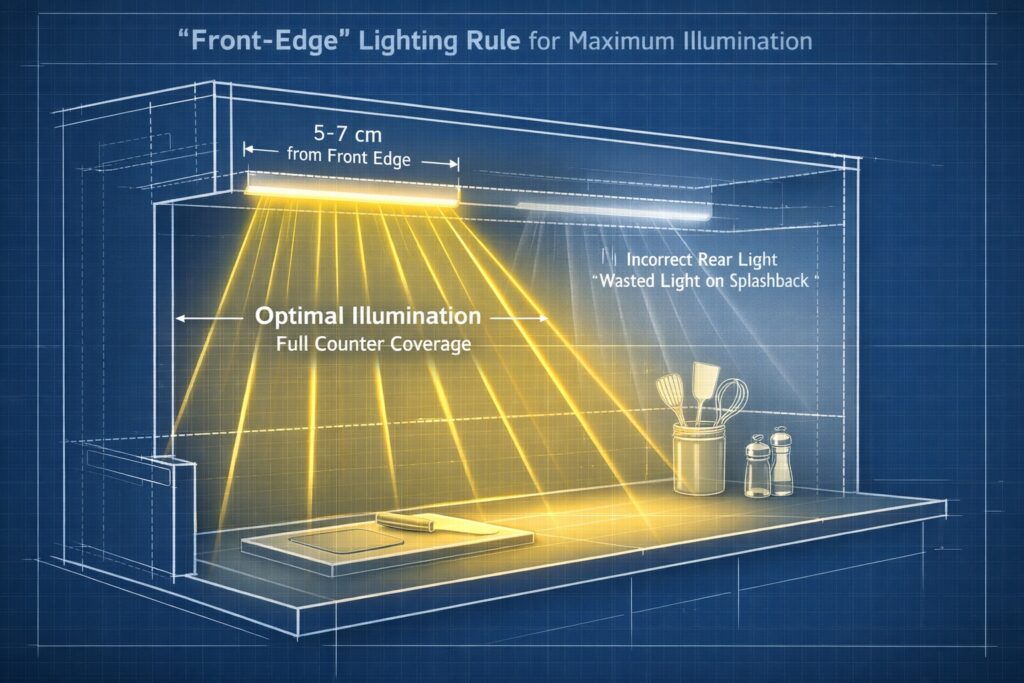
Where you position under-cabinet lighting matters as much as what you choose. The common mistake is mounting lights against the wall at the back of the cabinet. This throws light onto the splashback rather than the worktop, and the front edge of the cabinet creates a shadow line across your work surface.
The Correct Position
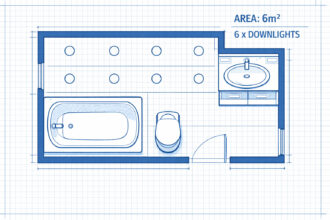
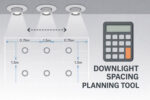
Mount the light toward the front of the cabinet, approximately 5–7cm back from the front edge. This pushes illumination forward onto the worktop where you actually need it.
The light should run the full length of your wall cabinets—gaps create dark spots that defeat the purpose. If you have multiple cabinet runs, treat each one as a continuous zone.
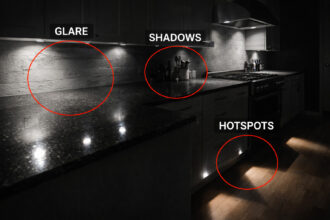
What to Avoid
Lights pushed against the wall: Creates glare on the splashback and shadows on the worktop.
Pucks spaced too far apart: Results in scalloped light patterns with dark areas between fixtures.
Bare LED strips without diffusion: Visible diode dots look unfinished and can cause glare.
Mounting too high inside the cabinet: Some cabinets have a front lip or frame. If you mount above this, the frame blocks light from reaching the worktop.
Brightness: How Many Lumens?
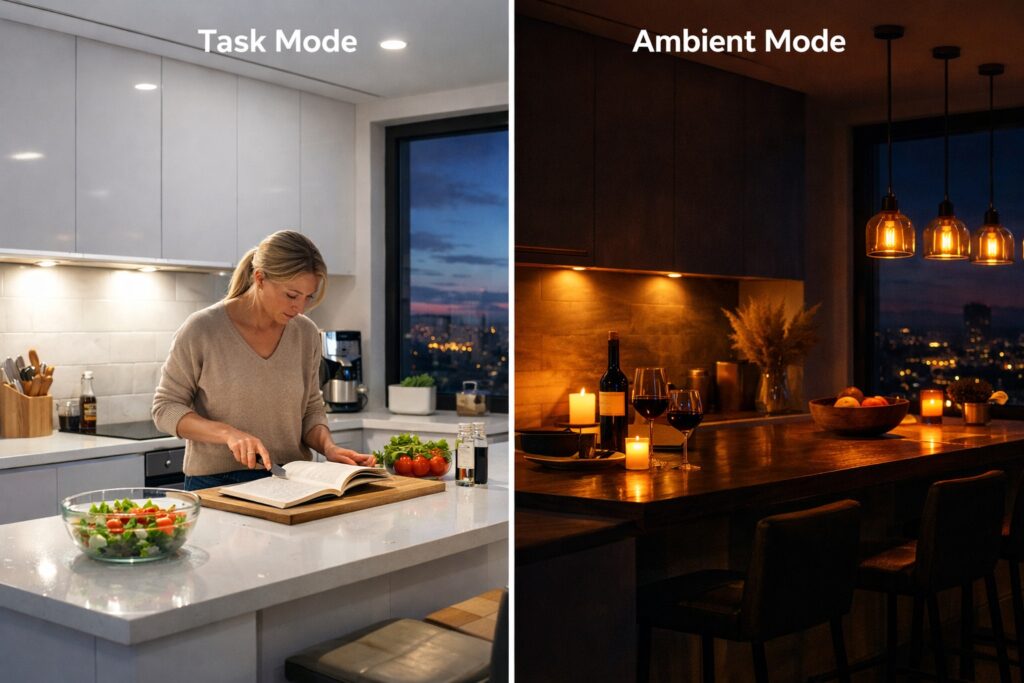
Under-cabinet lighting serves two roles: functional task lighting and ambient glow. The brightness you need depends on which role takes priority.
For Task Lighting
If you’re relying on under-cabinet lights as your primary worktop illumination, aim for 400–500 lumens per metre. This provides enough light for food preparation, reading recipes, and detailed tasks.
For Ambient or Accent Use
If you have good ceiling lighting and want under-cabinet strips mainly for atmosphere and fill light, 200–350 lumens per metre is sufficient. This creates a pleasant glow without overpowering the room.
Dimmability
The most flexible approach is to install brighter strips (400–500 lm/m) on a dimmer. You get full task lighting when needed and can dial it back for evening ambience. Most quality LED strips are dimmable, but check compatibility with your dimmer switch—LED-specific dimmers prevent flickering.
For help calculating brightness for your whole kitchen, see our lumens guide.
Colour Temperature: Matching Your Kitchen
Colour temperature affects how under-cabinet lighting feels and how well it coordinates with the rest of your kitchen lighting.
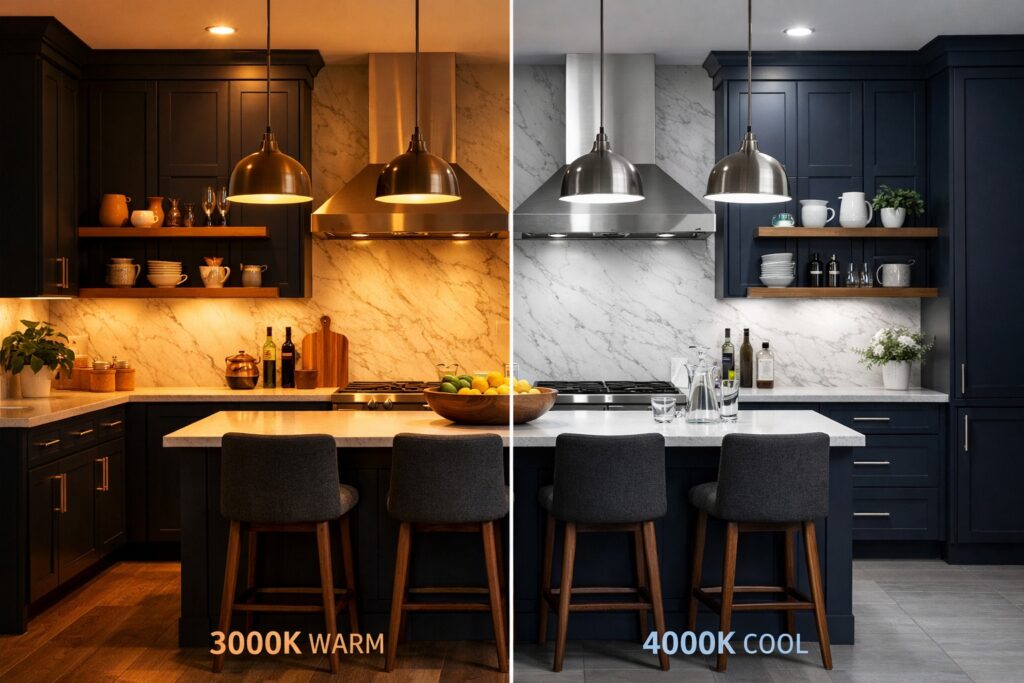
Recommended Colour Temperatures
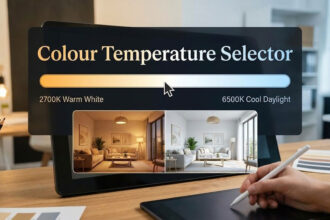
3000K (warm white): The most popular choice for kitchens. Warm enough to feel inviting, bright enough for task work. Works well with most cabinet colours and worktop materials.
4000K (cool white): Crisper and more clinical. Useful if your kitchen has very dark cabinetry that absorbs light, or if you want maximum colour accuracy for food preparation.
2700K (extra warm): Cosy and relaxed, similar to traditional incandescent bulbs. Better suited to ambient use than task lighting—can make food colours look slightly off.
Matching Other Light Sources
Under-cabinet lighting doesn’t have to match your ceiling lights exactly, but large differences are jarring. A common approach in UK kitchens is 3000K overhead with 3000K or 3500K under-cabinet—close enough to feel cohesive.
If you want flexibility, consider tunable white strips that adjust between warm and cool. These let you run cooler light during food prep and shift warmer in the evening.
For more detail, see our colour temperature guide for kitchens or our broader colour temperature explainer.

Wiring Options: Hardwired vs Plug-In
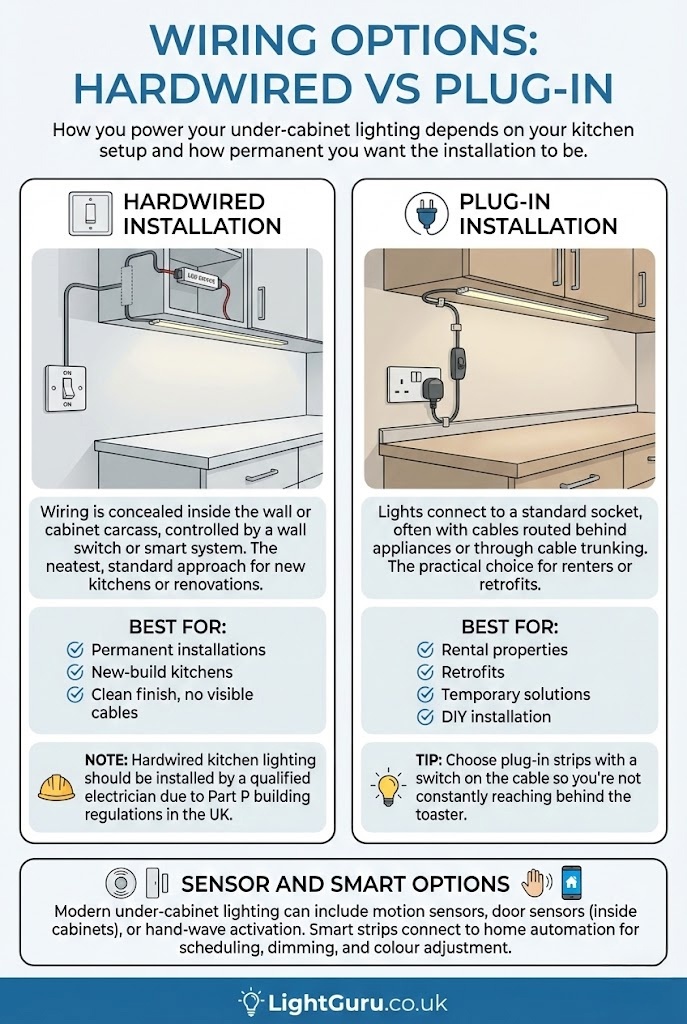
How you power your under-cabinet lighting depends on your kitchen setup and how permanent you want the installation to be.
Hardwired Installation
Wiring is concealed inside the wall or cabinet carcass, with the lights controlled by a wall switch or smart system. This is the neatest option and the standard approach for new kitchens or renovations.
Best for: Permanent installations, new-build kitchens, anyone who wants a clean finish with no visible cables.
Note: Hardwired kitchen lighting should be installed by a qualified electrician due to Part P building regulations in the UK.
Plug-In Installation
Lights connect to a standard socket, often with cables routed behind appliances or through cable trunking. This is the practical choice for renters or anyone adding lighting to an existing kitchen without major work.
Best for: Rental properties, retrofits, temporary solutions, DIY installation.
Tip: Choose plug-in strips with a switch on the cable so you’re not constantly reaching behind the toaster.
Sensor and Smart Options
Modern under-cabinet lighting can include motion sensors, door sensors (for inside-cabinet use), or hand-wave activation. Smart strips can connect to home automation systems for scheduling, dimming, and colour adjustment.
For a full lighting layout approach including wiring considerations, see our kitchen lighting planning guide.
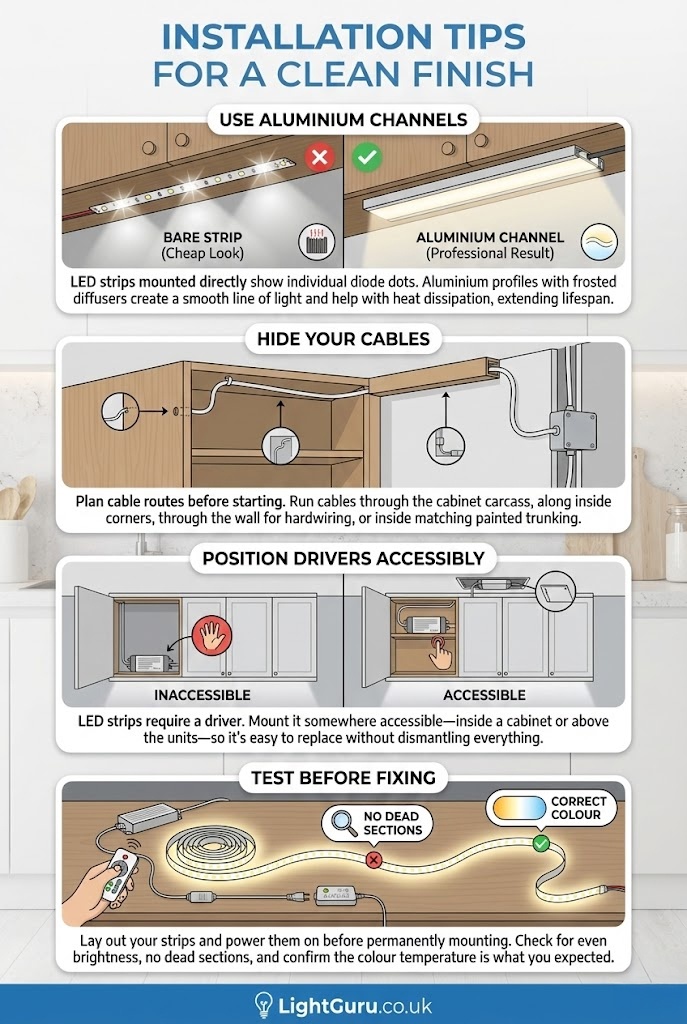
Installation Tips for a Clean Finish
A few practical details make the difference between a professional result and a DIY-looking job.
Use Aluminium Channels
LED strips mounted directly to the cabinet underside show individual diode dots and can look cheap. Aluminium profiles with frosted diffuser covers create a smooth, continuous line of light. They also help with heat dissipation, which extends LED lifespan.
Hide Your Cables
Plan cable routes before you start. Options include running cables through the cabinet carcass, along inside corners, through the wall (for hardwired installations), or inside painted cable trunking that matches your cabinets.
Position Drivers Accessibly
LED strips require a driver (transformer) to convert mains voltage. Mount it somewhere accessible—inside a cabinet or above the units—so you can replace it if needed without dismantling everything.
Test Before Fixing
Lay out your strips and power them on before permanently mounting anything. Check for even brightness, no dead sections, and confirm the colour temperature is what you expected.
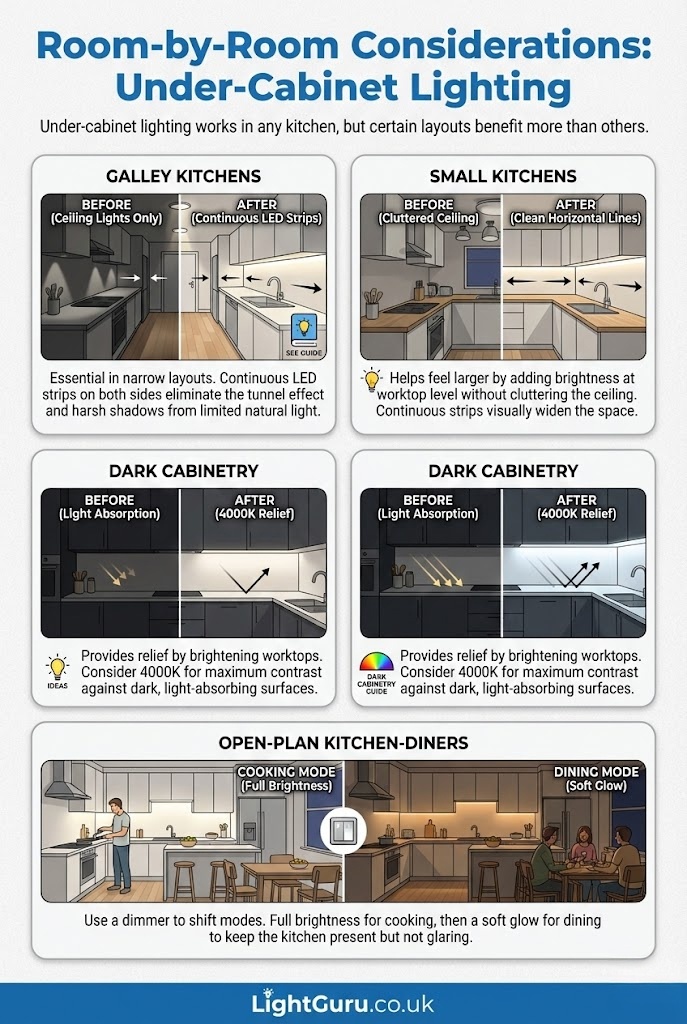
Room-by-Room Considerations
Under-cabinet lighting works in any kitchen, but certain layouts benefit more than others.
Galley Kitchens
In narrow galley layouts, under-cabinet lighting is essential rather than optional. The limited natural light and tight proportions mean ceiling lights alone create harsh shadows. Continuous LED strips along both sides of a galley eliminate the tunnel effect. See our galley kitchen lighting guide for more detail.
Small Kitchens
Under-cabinet lighting helps small kitchens feel larger by adding brightness at worktop level without cluttering the ceiling. Continuous strips create clean horizontal lines that visually widen the space. See our small kitchen lighting ideas.
Dark Cabinetry
Kitchens with dark-coloured cabinets absorb more light and can feel heavy or oppressive. Under-cabinet lighting provides relief by brightening the worktop zone. Consider 4000K for maximum contrast against dark surfaces. See our guide to lighting for dark cabinetry.
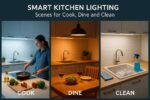
Open-Plan Kitchen-Diners
When your kitchen is visible from the living area, under-cabinet lighting on a dimmer lets you shift modes. Full brightness for cooking, then dim to a soft glow when you move to the dining table—keeping the kitchen present but not glaring.
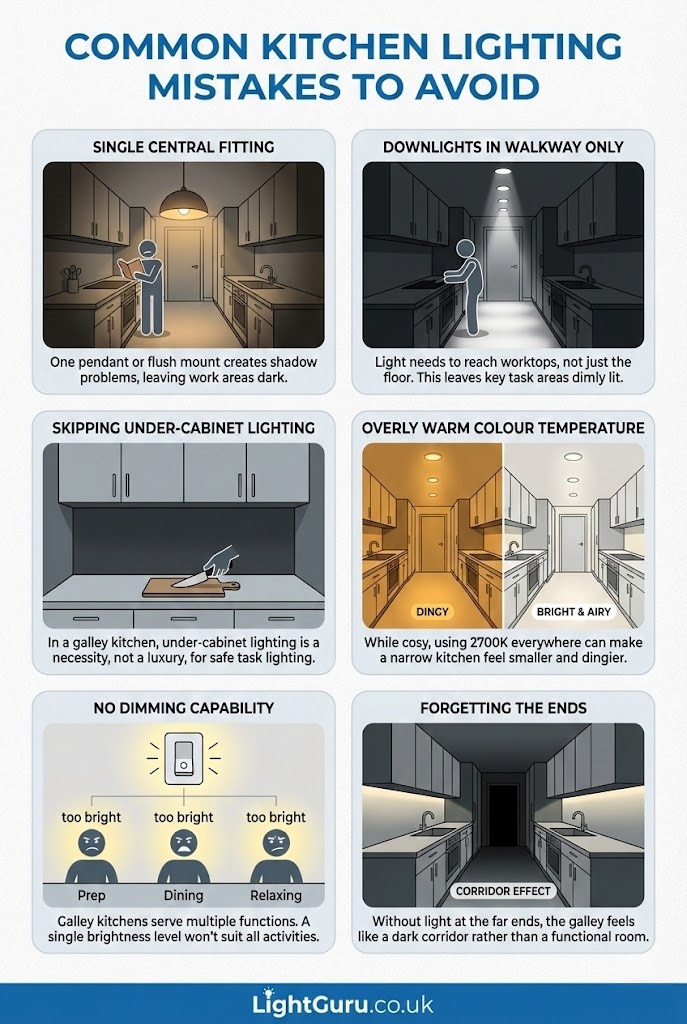
Common Mistakes to Avoid
Mounting at the back of the cabinet: Light hits the splashback, not the worktop. Always mount toward the front edge.
Choosing pucks for task lighting: The gaps between pucks create shadows. Use continuous strips if shadow-free prep light is the goal.
Skipping the diffuser: Bare LED strips look unfinished and create glare. Aluminium channels with diffuser covers are worth the small extra cost.
Mismatched colour temperatures: Under-cabinet lights that are noticeably warmer or cooler than your ceiling lights look disconnected. Stay within 500K of your main lighting.
Forgetting the dimmer: Cooking and relaxing need different light levels. A dimmer gives you both from the same installation.
Underestimating brightness needs: If under-cabinet lighting is your main task light source, don’t go too dim. 400–500 lumens per metre is a sensible minimum.
For more on what can go wrong, see our guide to kitchen lighting mistakes.
Quick Specification Guide
LED Strips
- 400–500 lumens per metre for task lighting
- 200–350 lumens per metre for ambient use
- 3000K for most kitchens, 4000K for dark cabinets
- CRI 90+ for accurate food colours
- Aluminium channel with diffuser for clean finish
Linear Bars
- Self-contained units, simpler installation
- Check lengths match your cabinet runs
- Same colour temperature and brightness guidance as strips
Puck Lights
- Suitable for accent or display lighting
- Not recommended as primary task lighting
- Space no more than 30cm apart if using for worktop illumination
Frequently Asked Questions
Can I install under-cabinet lighting myself?
Plug-in and battery-powered options are fully DIY-friendly. Hardwired installations should be done by a qualified electrician to comply with UK building regulations.
Should under-cabinet lights match my ceiling downlights?
They don’t have to match exactly, but aim for similar colour temperatures. A difference of more than 500K becomes noticeable. Many kitchens use 3000K for both overhead and under-cabinet lighting.
How far from the front of the cabinet should lights be mounted?
Position them 5–7cm back from the front edge. This throws light onto the worktop rather than the splashback.
Are LED strips safe in kitchens?
Yes, provided you use strips rated for the environment and install them correctly. Keep drivers away from heat sources and ensure proper ventilation.
Can under-cabinet lights be my main task lighting?
Yes, many kitchens rely on them as the primary worktop illumination. Just ensure you choose sufficient brightness (400–500 lumens per metre) and run strips the full length of your work zones.
Final Thoughts
Under-cabinet lighting is one of the highest-impact, lowest-effort upgrades you can make in a kitchen. It solves the fundamental problem of worktop shadows, adds a layer of quality to the room’s appearance, and provides flexible lighting for different times of day.
The key decisions are simple: choose LED strips for continuous coverage, mount them toward the front of the cabinet, match your colour temperature to the rest of the kitchen, and install a dimmer for flexibility. Get those right, and you’ll wonder how you ever worked without it.
For more ideas on lighting your whole kitchen, explore our complete Kitchen Lighting Guide.