
Scope: This guide focuses on layouts for narrow or galley-style spaces. For broader lighting principles and fixture types, see our complete Kitchen Lighting Guide.
Table of Contents
Why Galley Kitchens Are a Lighting Challenge
Galley kitchens have a reputation for feeling dark and cramped. The corridor layout—cabinets on both sides, limited natural light, narrow walkways—creates the perfect conditions for shadows. Stand at your worktop and your body blocks the ceiling light behind you. The result? You’re chopping vegetables in your own shadow.
But here’s the thing: galley kitchens can actually feel surprisingly spacious with the right lighting. The narrow footprint means you need fewer fittings to achieve even coverage, and the linear shape lends itself beautifully to clean, symmetrical lighting schemes.
The goal is straightforward: eliminate shadows, brighten the full length of the space, and create enough flexibility for different tasks and moods.
The Layered Approach: Three Types of Light You Need
Effective galley kitchen lighting combines three layers working together.
Task lighting illuminates your worktops directly – this is where under-cabinet strips and well-positioned downlights come in. Without proper task lighting, you’ll struggle with shadows every time you prepare food.
Ambient lighting provides overall brightness so the space doesn’t feel like a tunnel. Downlights running the length of the ceiling typically handle this role.
Accent lighting adds depth and visual interest. Plinth lights, cabinet-top strips, or a feature fitting at the end of the galley can transform a functional corridor into a space with character.
For more on avoiding common pitfalls, see our guide to kitchen lighting mistakes.
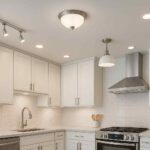
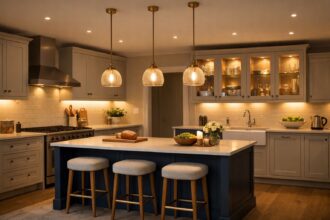
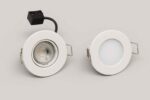
Downlights: Getting the Position Right
Downlights are the backbone of most galley kitchen lighting schemes. They provide consistent, shadow-free illumination—but only if you position them correctly.
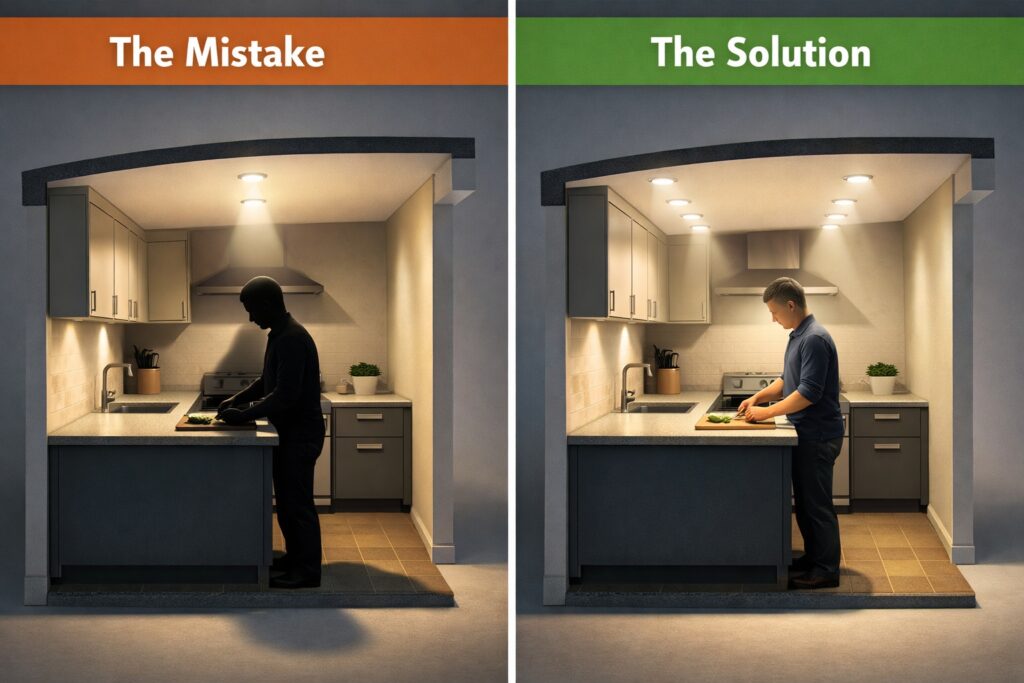
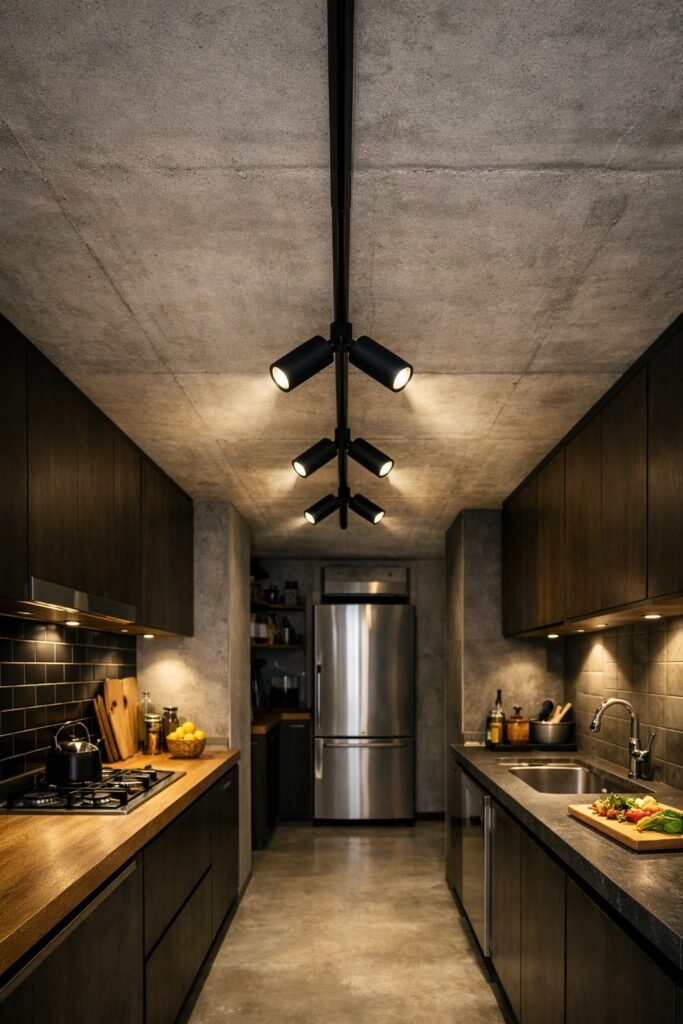
The Classic Mistake
Placing a single row of downlights down the centre of the ceiling. This looks logical on paper, but in practice it means the light hits your back while you face the worktop. Your cabinets and body cast shadows exactly where you need to see.
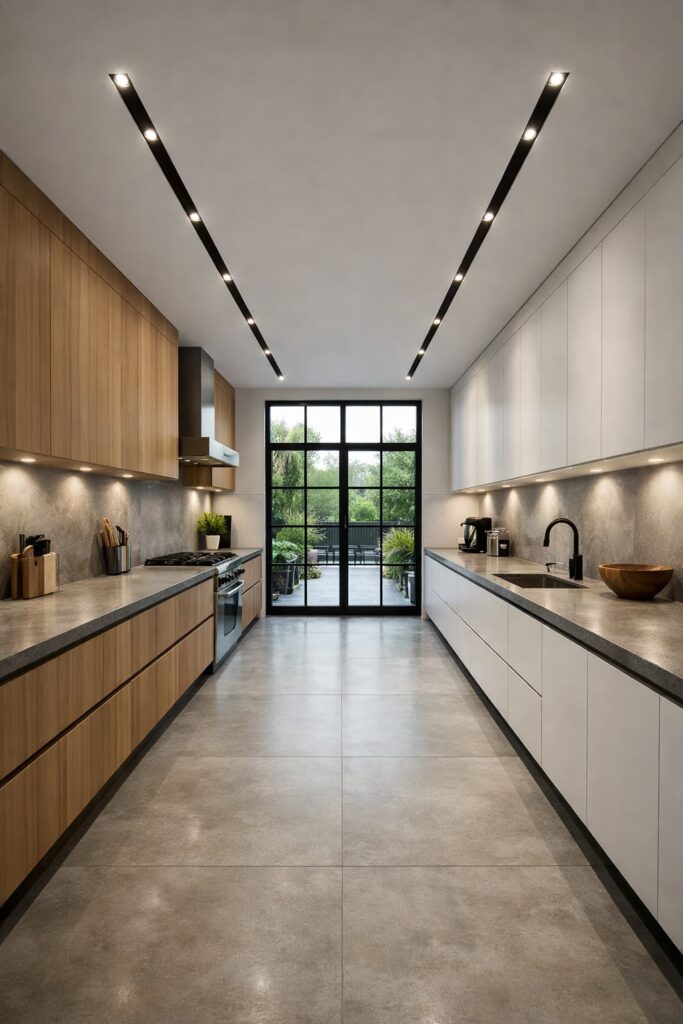
The Better Approach
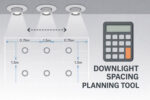
Run two parallel rows of downlights, one above each worktop. Position them approximately 50–60cm from the wall so they illuminate the work surface rather than the cabinet doors.
For spacing between fittings, a general rule is half the ceiling height. In a kitchen with 2.4m ceilings, that means roughly 1.2m between each downlight. Our downlight spacing calculator can help you work out the exact layout for your space.
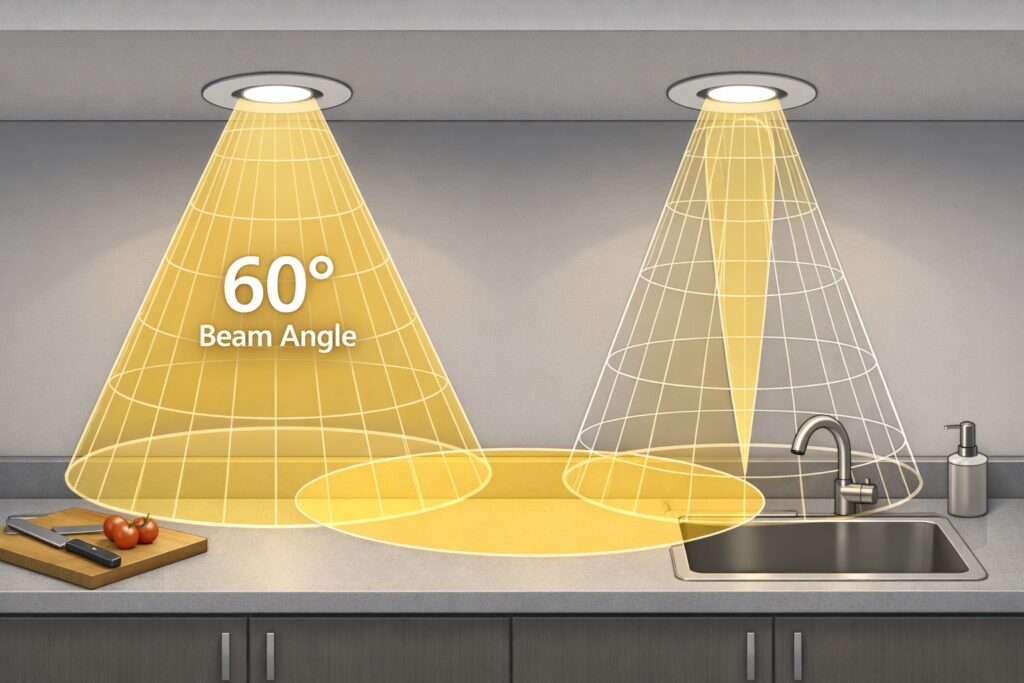
Beam Angle Considerations
For general coverage in a galley kitchen, choose downlights with a beam angle between 38° and 60°. Narrower beams (around 24°) work well for highlighting specific zones like the sink, but using them throughout will create pools of light with dark spots between.
If your galley has low ceilings, see our advice on low ceiling kitchen lighting for additional considerations around fixture depth and beam spread.
Recessed vs Surface-Mounted
In most galley kitchens, recessed downlights work best—they maintain clean sightlines and don’t reduce headroom. However, if you have concrete ceilings or limited void space, surface-mounted options can achieve similar results. We cover the trade-offs in detail in our recessed vs surface-mounted lighting guide.
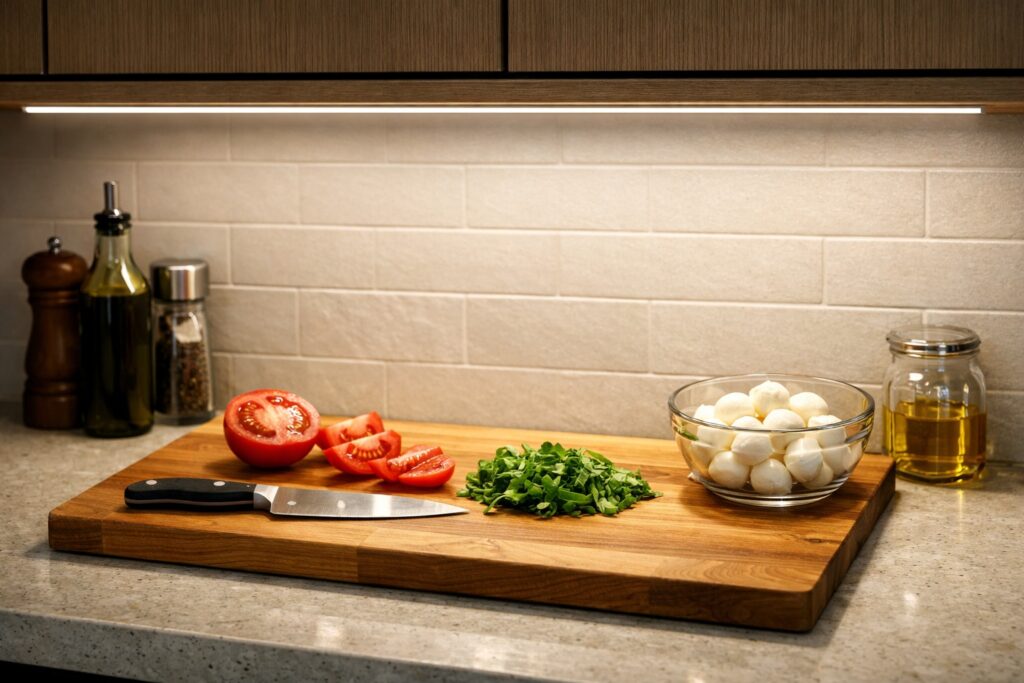
Under-Cabinet Lighting: The Shadow Eliminator
Even with perfectly positioned downlights, wall cabinets create shadows on the worktop below. Under-cabinet lighting solves this by illuminating the work surface from the front.
This isn’t optional in a galley kitchen—it’s essential. The narrow layout amplifies any shadow problem, and under-cabinet strips make an immediate, visible difference to how usable the space feels.
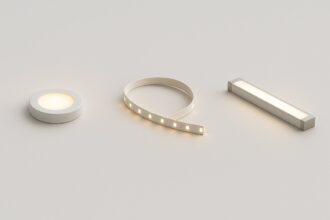
Choosing Between Strips, Bars, and Pucks
LED strips provide continuous, even light along the full length of your cabinets. They’re slim, easy to install, and work particularly well with modern or minimalist kitchens.
Linear bars are self-contained units that mount under cabinets. They’re slightly easier to install than strips (no cutting or soldering) and often come with integrated switches.
Puck lights create pools of light rather than continuous illumination. They suit traditional kitchens where you want a softer, more characterful look, but they’re less practical for task lighting.
For a detailed comparison, see our guide to puck vs strip vs linear under-cabinet lighting.
Installation Tips
Mount strips or bars toward the front edge of the cabinet, not against the wall. This throws light onto the worktop where you need it rather than illuminating the splashback.
If your cabinets have a visible underside, consider using aluminium profiles to house LED strips. They look neater, help with heat dissipation, and reduce the dotted appearance that bare strips can create.
Aim for 350–500 lumens per metre along each worktop run. More detailed brightness guidance is available in our under-cabinet lighting guide.
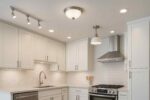
Track Lighting: A Flexible Alternative
Track lighting works brilliantly in galley kitchens where rewiring isn’t practical or where ceiling voids won’t accommodate recessed fittings.
A single track running down the centre of the ceiling can support multiple adjustable heads. Angle some toward the left worktop, others toward the right, and one or two toward the walkway for balance. You get the flexibility to redirect light as needed without cutting into the ceiling.
Modern track systems have moved on from the chunky designs of the past. Slimline profiles in black, white, or brushed metal look clean and contemporary.
For more on this option, see our full guide to track lighting in kitchens.
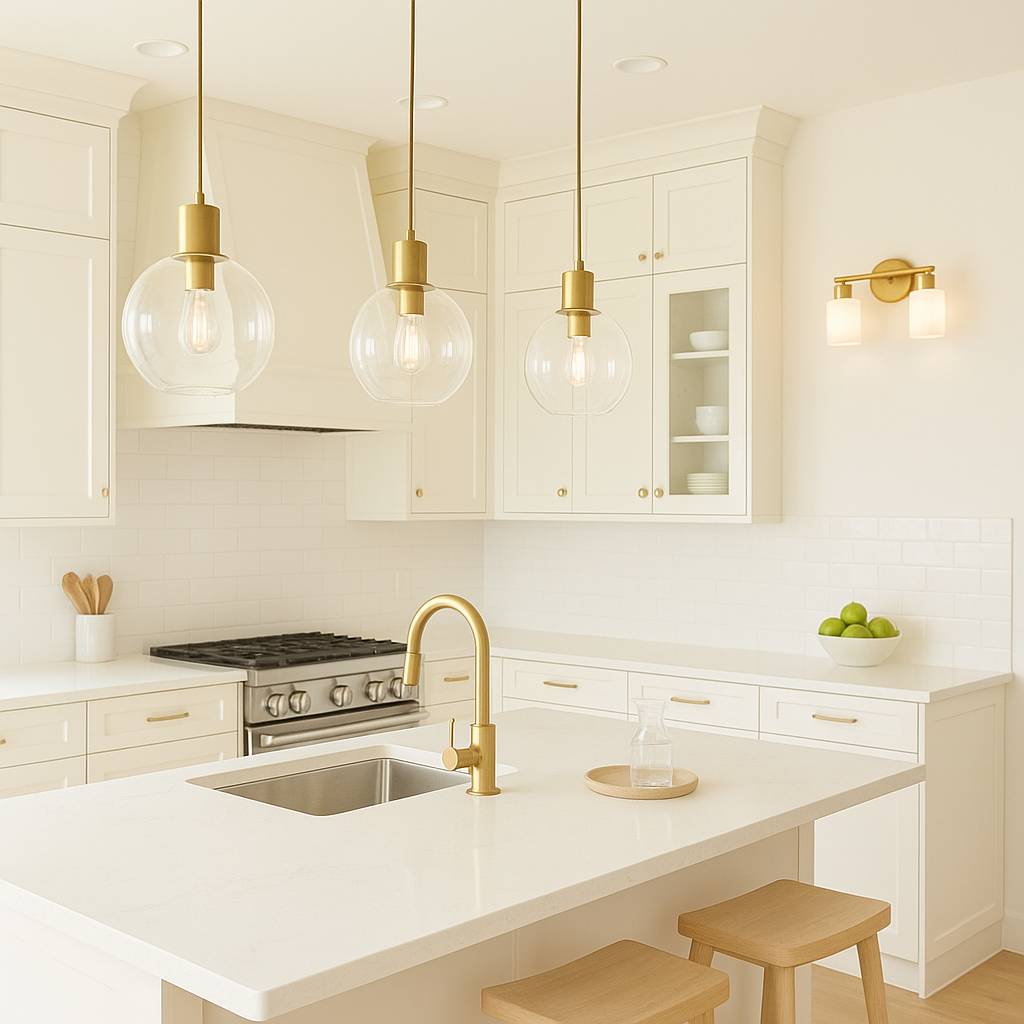
Wall Lighting: Making the Space Feel Wider
Here’s an underused trick for galley kitchens: add light to the walls.
When you wash a wall with soft light, it visually recedes, making the room feel wider. This works especially well at the ends of a galley kitchen, where a wall sconce or picture light can transform a dead end into a design feature.
Wall lights also create a warmer, more layered atmosphere for evening use—perfect if your galley doubles as a breakfast bar area or opens into a dining space.
Where to Position Wall Lights
The ends of the galley work best. A pair of sconces framing a window or artwork creates a focal point and draws the eye through the space.
If one wall is free of cabinets, wall lights along that side add ambient warmth without interfering with storage.
What to Avoid
Fixtures that project too far into the walkway—galley kitchens are tight enough already. Also avoid placing wall lights directly above the hob, where heat and grease will cause problems.
Colour Temperature: Warmer Than You Think
Colour temperature has a significant impact on how a galley kitchen feels. The wrong choice can make a narrow space feel clinical or, conversely, cramped and dingy.
Recommended Colour Temperatures
3000K (warm white) suits most galley kitchens. It’s warm enough to feel inviting but bright enough for food preparation. This is the sweet spot for modern kitchens with white or light-coloured cabinetry.
3500K (neutral white) offers slightly crisper light, useful if you want clearer colour rendering for food prep or if your kitchen has a more contemporary aesthetic.
4000K (cool white) creates a clinical, high-contrast look. It can work in ultra-modern kitchens but tends to emphasise the narrow proportions of a galley.
Avoid anything above 4000K unless you’re deliberately going for a commercial or industrial aesthetic.
Consistency Matters
Whatever temperature you choose, keep it consistent across all fittings. Mixing 2700K pendants with 4000K downlights creates a jarring, disconnected look.
For more detail on choosing the right colour temperature, see our kitchen colour temperature guide and our broader colour temperature explainer.
Accent Lighting: Adding Depth to a Narrow Space
Galley kitchens can feel flat—one long corridor with cabinets on both sides. Accent lighting breaks this up by giving the eye places to rest and creating visual layers.
Plinth Lighting
LED strips installed along the kickboards at floor level create a floating effect that makes cabinets appear lighter. This is particularly effective in kitchens with dark flooring, where the glow reflects upward.
Cabinet-Top Lighting
If there’s a gap between your wall cabinets and the ceiling, LED strips on top throw soft light upward. This lifts the ceiling visually and adds warmth without brightness.
Shelf and Display Lighting
Open shelving with integrated lighting creates focal points and breaks up the monotony of solid cabinet runs.
For strip light installation advice, see our guide to LED strip lighting in kitchens.
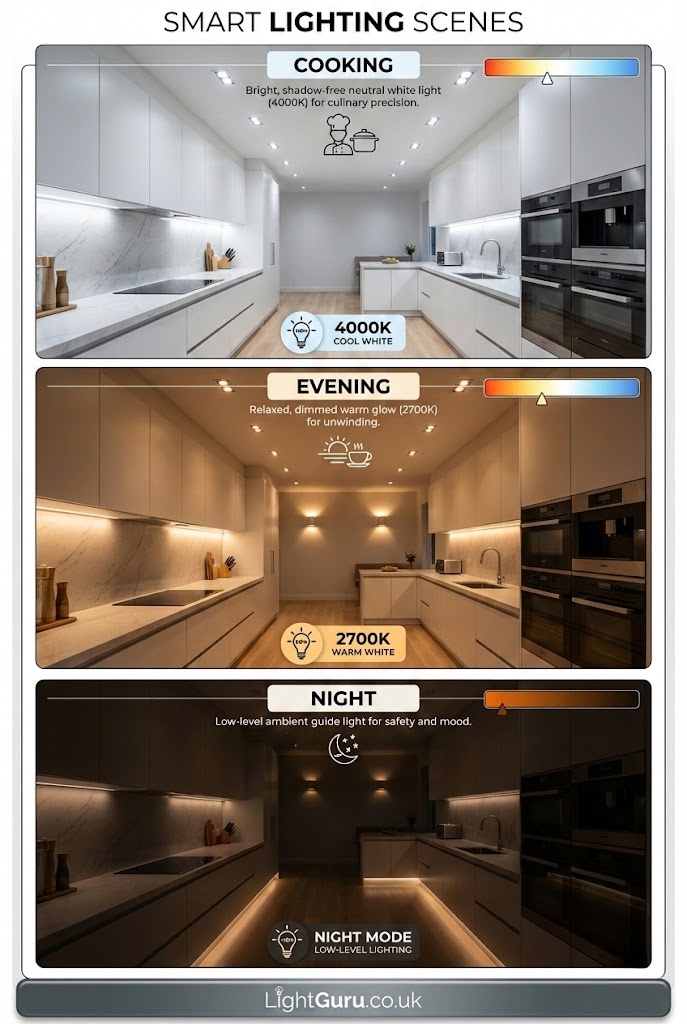
Smart Lighting: Scenes for Every Task
Galley kitchens often serve multiple functions throughout the day—morning coffee, meal prep, late-night snacks, even casual dining if there’s a breakfast bar. Smart lighting lets you adapt the space to each use.
Suggested Scenes
Cooking mode: Full brightness, 3500–4000K, all downlights and under-cabinet strips on. Maximum visibility for food preparation.
Evening mode: Dimmed to 50–70%, 2700–3000K, accent lighting on. Warm and relaxed without the clinical brightness.
Night mode: Plinth lights or under-cabinet strips only, dimmed low. Enough light to navigate without waking the household.
Smart switches or bulbs make these transitions effortless. See our smart kitchen lighting scenes guide for setup advice.
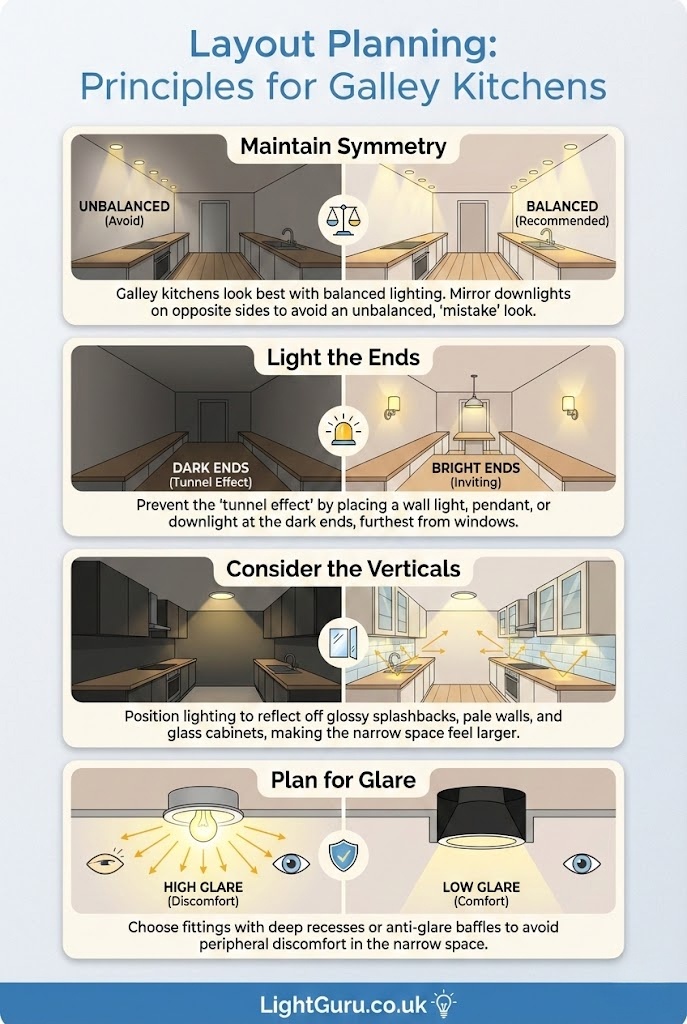
Layout Planning: Principles for Galley Kitchens
A few planning principles will help you avoid common problems.
Maintain Symmetry
Galley kitchens look best with balanced lighting. If you run downlights above one worktop, mirror them on the opposite side. Asymmetry in a narrow space tends to look like a mistake rather than a design choice.
Light the Ends
The ends of a galley are often the darkest points—furthest from windows and easily overlooked in lighting plans. A wall light, pendant, or even a well-placed downlight at each end prevents the tunnel effect.
Consider the Verticals
Glossy splashbacks, pale walls, and glass cabinet doors all reflect light and make the space feel larger. Position your lighting to take advantage of these surfaces.
Plan for Glare
In a narrow space, you’re more likely to catch downlights in your peripheral vision. Choose fittings with good glare control (deep recesses or anti-glare baffles) to avoid discomfort. Our guide to kitchen lighting glare and shadows covers this in detail.
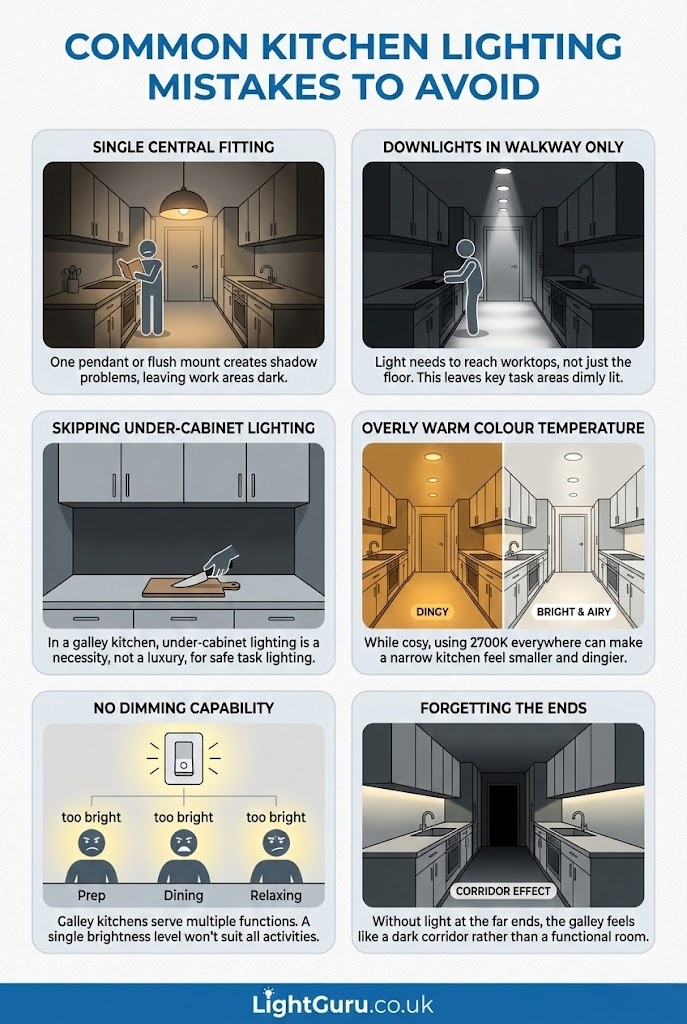
Common Mistakes to Avoid
Single central fitting. One pendant or flush mount in the centre of the ceiling creates exactly the shadow problems galley kitchens are prone to.
Downlights in the walkway only. Light needs to reach the worktops, not just the floor.
Skipping under-cabinet lighting. In a galley kitchen, this isn’t a luxury—it’s a necessity.
Overly warm colour temperature throughout. While 2700K creates a cosy atmosphere, using it everywhere can make a narrow kitchen feel smaller and dingier.
No dimming capability. Galley kitchens serve multiple functions. A single brightness level won’t suit all of them.
Forgetting the ends. Without light at the far ends, the galley feels like a corridor rather than a room.
For a broader look at what can go wrong, see our guide to kitchen lighting mistakes.
Quick Specification Guide
Downlights
- Fire-rated for kitchen use
- 3000–3500K colour temperature
- CRI 90+ for accurate colour rendering
- 38–60° beam angle for general lighting
- Narrower beams (24–36°) for sink or task focus
Under-Cabinet Lighting
- LED strips for continuous light
- 350–500 lumens per metre
- Aluminium profiles for a cleaner finish
- Warm white (3000K) to match ceiling lighting
Track Lighting
- Adjustable heads for flexibility
- Slimline profile for modern aesthetics
- White to blend with ceiling, black for contrast
Wall Lights
- Soft, diffused output
- Minimal projection from wall
- Warm white for ambient use
Frequently Asked Questions
What is the best lighting for a galley kitchen?
A combination of downlights positioned above the worktops and under-cabinet LED strips. The downlights provide overall brightness while the strips eliminate shadows where you prepare food.
Should I put downlights in the centre of a galley kitchen?
No. Central placement means you’ll cast shadows onto the worktop when facing the cabinets. Position downlights in two rows, one above each worktop, approximately 50–60cm from the wall.
How bright should a galley kitchen be?
Aim for 250–350 lumens per square metre for general lighting, with higher intensity (400–500 lumens per square metre) over task areas. Our lumens guide explains how to calculate requirements for your space.
Is track lighting suitable for galley kitchens?
Yes—it’s an excellent choice when rewiring is difficult or ceiling voids are shallow. A single track down the centre with adjustable heads can illuminate both worktops effectively.
What colour temperature should I use?
3000K works well for most galley kitchens, balancing warmth with task visibility. Use 3500K if you prefer crisper light for food preparation.
Final Thoughts
Galley kitchens aren’t inherently dark or cramped—they just need lighting that works with their proportions rather than against them. Two rows of downlights over the worktops, proper under-cabinet strips, consistent colour temperature, and a few accent touches can transform a narrow kitchen into a bright, functional, and genuinely appealing space.
For more ideas across all kitchen styles and layouts, explore our complete Kitchen Lighting Guide.